Monday, February 10, 2014

5 Easy Cleaning Tricks to Make Your Life Easier

As much as I enjoy cleaning and organizing, finding the time to do so can be down right difficult. But with pet hair flying around, and our house being shut up tight for the winter, the cleaning schedule is one I really try to adhere to. This doesn't mean I have to spend hours each day tidying up the house though. Here are five tips and tricks I've found and tried that are saving me time in my cleaning routine!


1. Cleaning the Microwave


I try to clean our microwave once a month and, so far, that seems to be enough. But sometimes you get those glued on specks of food that just don't want to budge. Try putting a bowl or cup of water in the middle of the microwave with a teaspoon or so of baking soda. Run the microwave on high power for 1-2 minutes until the water is close to boiling or just starting to boil. Then, carefully remove the cup of water and wipe down the microwave with a damp cloth. The steam from the water should help to loosen any stuck on food and the baking soda in the water helps to eliminate any odors hanging around inside the microwave. Plus, using just water and baking soda eliminates any chemical smells or reactions that other cleaners might cause inside of a microwave. 

2. Removing Pet Hair From Furniture


It's no secret that we have a dog and a cat running around our abode. Their hair is everywhere! I try to vacuum the furniture at least once a week to keep the pet hair under control, but that's not always enough. The vacuum tends to get all the loose hair off the cushions, but there are always pesky hairs really stuck in the fabric that just don't want to come up. Who would have thought a squeegee would be the answer? Certainly not me! But it works amazing. Just take a dry shower or window squeegee and run it across the cushion. As you can see from the embarrassing picture above, it works to get all those pesky hairs off the furniture! (Note: This seems to work better on textured fabric and did not work as well on our microfiber couch.)

3. Dusting LCD Screens


LCD screens are common in most homes today whether they are on a TV or a computer monitor. It gets confusing sometimes as to safe ways to clean these screens. I've tried to dust our LCD screens with a dry microfiber cloth and, while this works relatively well, the static created by the screen sometimes just won't give up dust particles or pet hair. For some reason, using a coffee filter on these screens seems to do the trick! Just dust the screen off with a coffee filter and it collects the dust and hair from the screen very easily without creating more static. 

4. Cleaning the Shower Head


The shower head is an easy place to over look when you're cleaning. But it builds up mineral deposits and soap scum which will impact your water pressure and water flow in the shower. I've tried chemical based cleaners to unclog our shower heads in the past and, while they seem to work well, the chemical smell is over powering. I'm learning quickly that vinegar pretty much cleans everything and this includes shower heads. I put some vinegar in a plastic baggy and wrapped it around our shower head making sure the entire head was immersed in the vinegar. Then I just gathered the bag at the top and clipped it with a bag clip. I let it sit for most of the day and then removed it and ran the water for about a minute. Looked like new! If your shower head is extra icky, you can try adding a little bit of baking soda to the bag just before you clamp it shut. The chemical reaction between the baking soda and vinegar will help to get really stuck on grime off.

5. Dusting the Base Boards


I try to dust our base boards once a month or so because they do collect a lot of dust and pet hair. As you can see from the picture, our base boards are relatively wide, so the collected dust is very easy to see. Because these boards are so close to the floor where most of the dust and hair fall, they tend to get dusty pretty quickly. I heard that dusting with a dryer sheet keeps surfaces cleaner longer, because it coats them with an anti-static cling film. Worth a try I say! I ran a dryer sheet along all the baseboards in our house and was surprised at how well the sheet actually collected the dust. It left a faint smell good scent along the way too. I may try dusting our furniture with a dryer sheet as well to see if it helps repel dust for larger surfaces too!

These are five easy tricks that you can use around your home to shorten up your cleaning time and reduce the amounts of chemicals you have to use to clean. I hope they've helped you as much as they are helping me!

Friday, February 7, 2014

Creating a Command Center: Dry Erase Family Calendar

After sprucing up our hanging mail organizer, I was motivated to continue working on our command center. About six years ago, I bought a dry erase calendar board to keep track of my appointments, special holidays, etc. When the Mister and I moved in together, that same dry erase calendar became our family calendar. When he makes plans, he puts them on the calendar so I know when he'll be busy or when to schedule other plans and vice versa. It works very well, but the board is starting to warp and it's color scheme of pink and green just doesn't match our home. Instead of going out and buying a new one, I scoured Pinterest looking for some ideas to make my own. Here is some of the inspiration I found:

{Image Via}

{Image Via}


20130605-231158.jpg
{Image Via}
I love the idea of using paint chips to make a calendar because it's completely customizable and relatively cheap! I decided to use this concept to make our new family calendar.


I wanted the calendar to be a decent size but not so large that it took up our whole desk space. I also wasn't looking to spend a ton of money, so I stopped by Salvation Army to see if I could find a cheap frame. I found this beauty for $4.99!


You should have seen the Mister's face when I walked in the door all excited with this. He was petrified I"d be hanging it up in the house.

I sanded the frame down and painted it a dark brown color to blend in with the rest of the house. I've used this paint on several other projects in the house so it matched nicely. 


I grabbed a piece of black poster board at the dollar store for $.69 and cut it to size. Then I stopped at Lowe's and picked up some paint chips. I gathered together colors that were already being used in the house or colors that we hope to bring in in the future so that the calendar would blend in. It will be centrally located in the house in the home office area so I wanted it to easily match. 

I cut the paint chips down to 2x2 inch squares and arranged them in a random pattern. 


Once I was happy with the pattern, I adhered the squares to the poster board with scrapbook adhesive. I used some of the scrap pieces to make day of the week spots and overlapped a few to create a place to write the month. 


I love how this project turned out. It blends in well in it's new home and works perfectly. I decided to leave it setting on the counter top for now because I'm contemplating adding some sort of color or pattern to the wood panel wall in this space but that project must wait for now. 


For just $5.68, we have a beautiful and custom dry erase calendar that will help keep our family organized and on schedule!

How do you keep track of your family's schedule? Have you used paint chips to create a custom piece in your home?

Wednesday, February 5, 2014

Creating a Command Center: Mail Organization

I believe there should be some law or rule about not having to work on your birthday... I also believe there should be some law or rule that says it cannot snow on your birthday. Yes, today is my birthday and yes I did have to work and yes there is a lot of blowing and drifting snow outside. Alas, I am another year older and another year wiser. Thank you to everyone that has expressed warm birthday wishes and thank you especially for taking some time to read my blog. I truly appreciate it from the bottom of my heart. Now... on to the organizing!

About six months ago, I purchased a hanging organizer from Thirty-One. I wasn't exactly sure what I was going to do with it, but I figured it'd help me stay organized. Unfortunately, without a specific plan in place, it has done just the opposite. I hung the organizer in our home office space off the dining room. At the time, there were random papers on the kitchen counter so I grabbed those and neatly tucked them into the hanging slots. While I successfully got the papers off the counter, there really
was no rhyme or reason to the hanging organizer. In fact, I recently went through the papers in the organizer and found that most of them were expired or no longer relevant - so ultimately my "organizer" was only encouraging me to hang on to clutter. This is a classic example of how organizing tools, when not used in a functional way, can actually encourage disorganization. So - time to get this organizer in order!


I have hmmed and hawed about whether or not to keep the organizer hung up and if so, whether to leave it where it is at. After contemplating this for a couple weeks, I decided that the organizer itself could be very useful and I feel it's hanging in the best possible spot for now. I took a random inventory of the piles on the kitchen counter to get an idea of what categories I might need storage for. I did this over the course of a couple weeks, since our paper flow fluctuates throughout the week and month. I finally decided on five categories, one for each slot of the organizer: 1.) Outgoing, 2.) To File, 3.) To Read, 4.) To Pay, and 5.) Coupons.

I knew that if I didn't label these slots, I'd forget which is what and things would end up stuck in random slots and again, not be helpful. So I used Microsoft Excel to design some simple labels.


I printed out each label on regular white printer paper and used some packaging tape to make them a bit more sturdy. I've really got to invest in a laminating machine! That'd be a great birthday present idea... ;)


As you probably noticed, the final labels look a bit different than the labels shown in Excel. When I printed a test label, I realized the labels would be too big for the slot, especially when paper would be stuffed into each one. I modified the size just a tad and they work perfectly now. 

I didn't want the label to be permanent in anyway because I want to use this system for awhile and be able to make adjustments if necessary. For that reason, I just used small binder clips we had in our office supplies to attach each label to it's own mail slot.


Next, I went through all the papers that had been in the organizer and all the papers that had accumulated on the counter and sorted them accordingly. Everything seemed to fit into a category relatively easily.


The organizer is a little more bright and cheery and, with its new labels, it appears to be a bit more functional as well. I'm excited to put this great tool to good use!

Do you have an organizing tool that is hurting more than helping? How about a general birthday rule you think should be in effect?

Monday, February 3, 2014

Make-up Storage & Organization

I'm not a huge make-up person. That being said, I seldom leave the house without mascara... Anyway, the make-up I do have sits in a decent sized bag on the counter in our main bathroom. When I know we're having company, I slide it into the under sink cabinet but for the most part, it's out all the time. The bag is way too big for what I have so I lose stuff in it and then find it when it's expired or dried out. Speaking of expired make up, if you didn't realize it could expire or are unsure of the shelf life of certain products, go here. To remedy this situation, I decided to overhaul my make-up storage.


My first step was to clean all of my brushes and throw out anything expired, dried up, or unwanted. I clean my brushes using mild baby shampoo, rinse them really well, and let them air dry overnight.


Sometimes it grosses me out to see how much junk comes off these things! But it does encourage me to wash them more often.

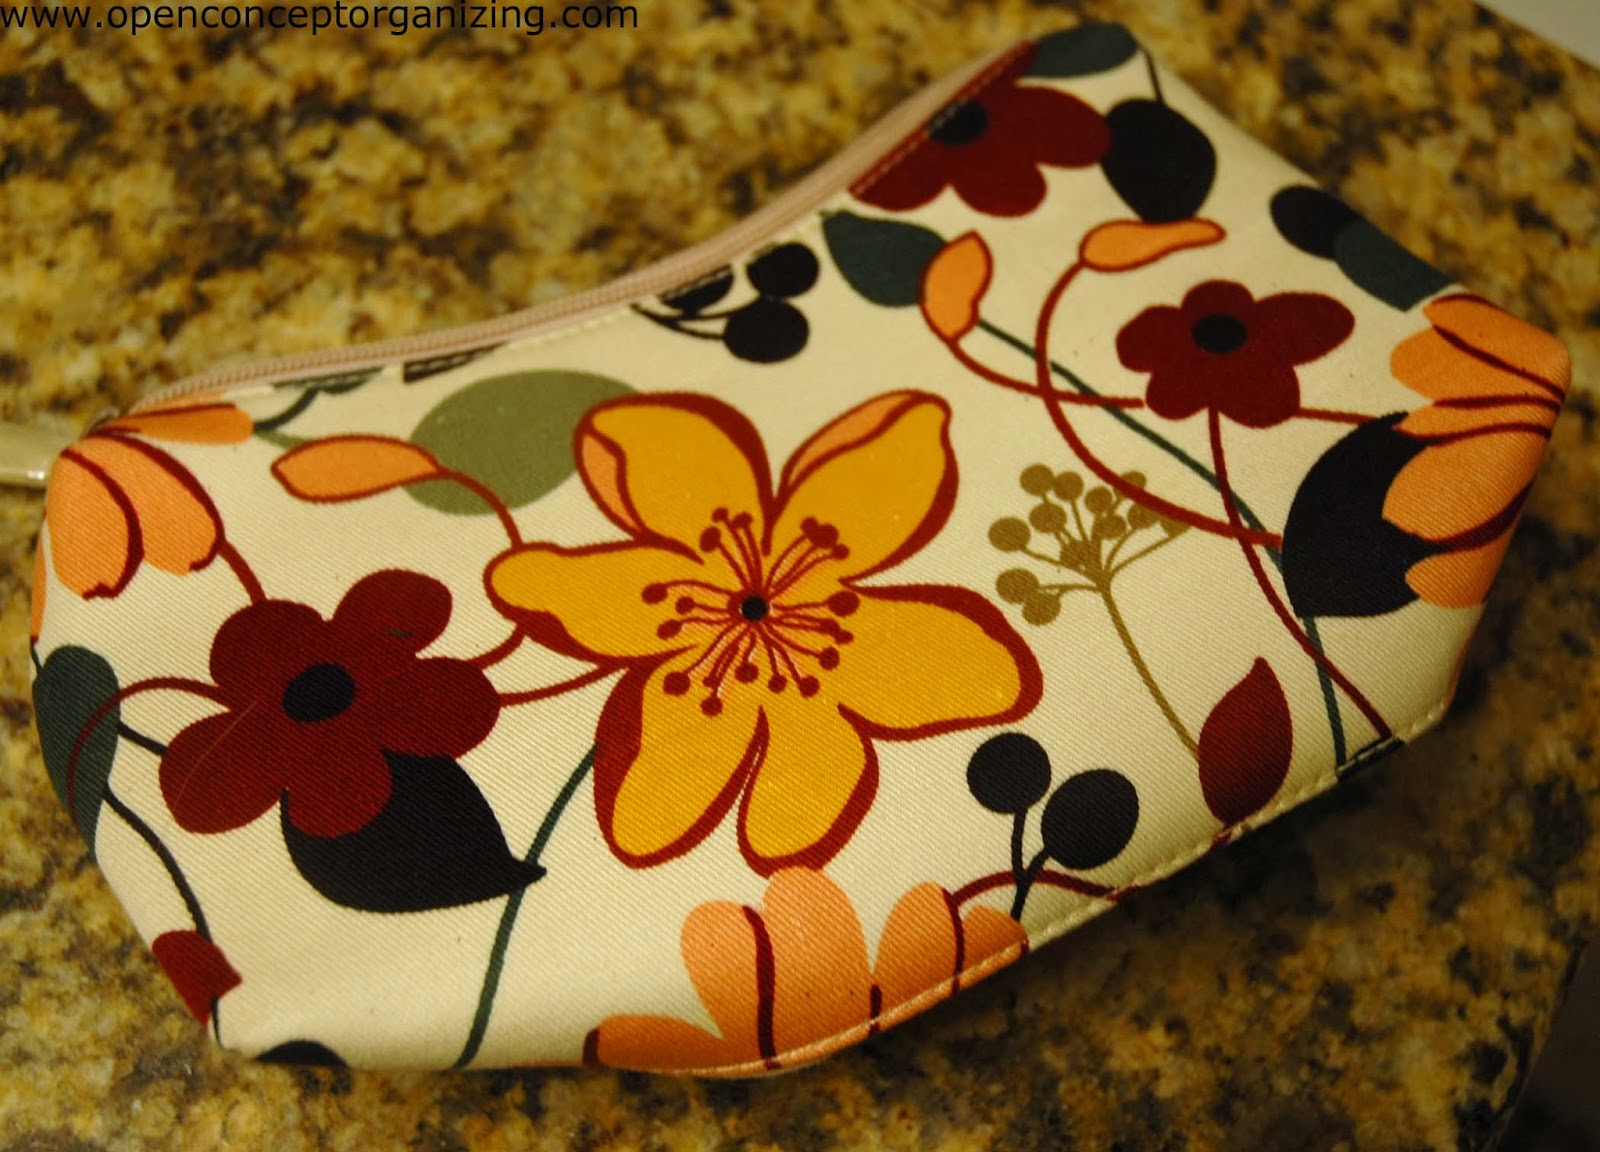
Once I saw what was left, I went out on a mission to find a smaller make-up bag. It was my intention to visit our local beauty supply store, but ironically, on my way there I stopped into the Salvation Army for a separate project. I just happened to walk by this beauty:


$1.99 and brand new! Yes, please. It was the perfect size and definitely the perfect price and I love the bold colors.

So home I went to start organizing. I saw this picture on Pinterest awhile back and was inspired:


Image Via


Our main bath has a bit of a beach theme and I have a glass jar on the counter already that is full of rocks that the Mister and I have collected throughout our traveling adventures. I figured this would be a perfect way to store my brushes. I was hesitant about the idea of dust and germs collecting on them, but they are tucked back in the corner far enough that I'm not super concerned with germs. I've also added cleaning these brushes to my cleaning schedule to ensure I do it at least every three months. Perhaps I will up that to once a month if I like keeping them out in the open.


I put all the remaining make-up contents into my new bag. I adhered a command hook to the inside of the bathroom cabinet and hung a pants hanger on it.


This allows me to clip the bag onto the hanger when it's not in use, and easily bring it up to the counter when I need it. No more big, ugly bag on the counter!


So for a simple $1.99, I was able to overhaul my make-up storage and start on a clean slate!

Do you have any make-up storage tips and tricks?
Related Posts Plugin for WordPress, Blogger...