Friday, January 10, 2014

Five Easy Organizing Tips

Simple is always better, especially when it comes to getting and staying organized. While we all have big projects to tackle, the holiday season usually eats up the time and money available for them. That doesn't mean that organizing has to be put on hold, though. I've put together a short list of five easy organizing ideas to help you get organized going into this New Year.

1. Super Easy Shower Cleaner


I hate cleaning the shower. It's one of my most un-favorite cleaning tasks. I usually end up more wet than the shower. Because I dislike this chore so much, I don't do it as often as I should, which results in a bigger and more difficult job when I do clean. I figure if I'm going to get wet when I clean the shower anyway, why not clean the shower when it's my intention to get wet?

I found the dish washing wand at the dollar store. Yes, the dollar store. Fill the wand with half white vinegar, and half dish soap. Hang it in the shower. Next time you're in there getting yourself clean, grab the wand and scrub down a wall or two. It really works! No more spray bottle, sponge, scrub brush, and wet socks. Just a sparkly clean you and a sparkly clean shower!

2. Scarf Organizer


It's certainly scarf weather here in Michigan and, like most ladies, I have built up quite a collection of scarfs to wear. For awhile, I had them rolled in a drawer but they didn't stay rolled. Then I tried hanging them in the closet on a hanger but they all slouched together or slid off as soon as I tried to pull one out. Then I found a bag of plastic shower rings in a storage box downstairs and a brilliant idea on Pinterest and built myself a handy organizer. Simply clip the shower rings onto the hanger and hang one scarf through each ring. The hanger can hang in your closet or out on a hook as a decor object in your bedroom. It's easy to get to the scarf I want and, more importantly, easy to put it back when I'm done with it.

3. Simple Sheet Storage


I mentioned above that cleaning the shower is my least favorite chore. Folding sheets falls close behind. I'll never forget the story my mom told me of how, when she was younger, she had to iron her sheets when they came out of the dryer before folding them or putting them on her bed. Ugh. I think I would have slept on a plain mattress! I've tried several different methods of folding sheets but I've settled on the gather-the-corners and fold method. That being said, pillow cases still got lost or buried at the bottom of the sheet pile and I couldn't find what I wanted when I needed it. Again, thanks to Pinterest, my problem is solved. Store your sheet sets inside one of the pillow cases. This saves room and keeps everything together. Plus, when that awful fitted sheet just doesn't fold evenly, no one will notice because it's neatly tucked into it's own case. Lovely!

4. File Your Clothes

I'm not suggesting you purchase a file cabinet to use as a dresser - though that would be a resourceful idea. But piling clothes on top of each other in a drawer not only makes it hard to see what you have, but it makes it almost impossible to get something at the bottom of the pile out of the drawer without either removing everything on top of it or making a mess. I have a lot of t-shirts. Every time the Mr. and I attend a concert or show, I usually end up with a t-shirt. And if we're somewhere that free t-shirts are being given out, I'm there jumping for mine. Storing all these shirts in a dresser drawer just wasn't working for me. I'd wear only a select few simply because I forgot I had the others. They were buried underneath, hidden and forgotten. So I took all the shirts out of the drawer, folded them in half, and stuck them in vertically, like a file cabinet. I folded most of them with the design facing out so I had somewhat of an idea what was what. Now, I just reach in, grab the shirt I want and move on. And when it comes to putting away laundry, I can just push the row back and put the newly folded shirts in front. It saves room and my sanity!

5. File Your Pans


Again, I'm not recommending stashing a file cabinet in your kitchen. In my gift ideas for organization lovers post, I highlighted the handy file folder organizer because of its versatility. I use mine in the kitchen to store all of our baking pans and cutting boards. Before this, they were stacked on top of each other in a drawer. While putting them away was easy, getting what I needed out was a pain. I found one of these organizers at a garage sale and stashed it in one of our larger cupboards. Each pan and cutting board has its own space and I can easily pull out and put in whichever item I need. No more heavy, noisy piles of metal pans! 

I hope these five simple ideas will bring some peace and sanity to your New Year!

What simple organizing tips keep you sane?

Note: Some of the above links may be affiliate links, meaning, at no additional cost to you, I may get a small commission if you make a purchase.  The affiliate program does not affect my decision of what products to share. I only feature items I would link to with or without an affiliate link. These items and my opinions about them are my honest to goodness personal thoughts and feelings. The Amazon Services LLC Associates Program is an affiliate advertising program designed to provide a means for sites to earn advertising fees by advertising and linking to Amazon.com. Thanks for your support! 

Wednesday, January 8, 2014

Paper Pile Management ~ Part 3

A few weeks ago, I decided to re-organize our home filing cabinet. I divided the project into three parts. First, I organized our active files into new, alphabetical file folders and gave them a new home in our home office area. Second, I decided to store our inactive files in accordion files placed inside a bankers box that can easily be stashed in our office closet. That left me with three very large folders with a lot of miscellaneous stuff inside.


One folder was full of our travel memorabilia. It held ticket stubs, maps, photos, and other souvenirs from our various trips and vacations. 

The second folder was labeled "wedding" and it was my way of "filing" all of the paper that we accumulated in the planning of our wedding. When the wedding was over, I wanted to get rid of that stash of paper quickly, so it seemed easy enough to throw it in a folder and stuff it into the filing cabinet. But with this new organization of our paper, it really didn't fit into the active or inactive files. 

The last folder was overflowing with warranty information and manuals for all of our appliances, furniture, and electronics. It was so hard for me to find anything in this folder when I needed it so I knew something better had to be done.

I decided to conquer these last three categories by storing the items inside a binder. The binders can be kept in a cupboard in the home office so they are easily accessible when needed but out of sight otherwise. I didn't want to spend a lot of money on this project because I don't think it's a permanent solution. Eventually, I'd like to make some sort of scrapbook or other project to document our travels and I'm not sure how long I want to hang on to all of the receipts from our wedding. But for now, this binder solution seems to work well.


I did the wedding binder first since it's the smallest. I went through all of the paper in the folder and divided it up into logical categories. In the end, I had four: Receipts; Photography; Memories; and Pre-marital Counseling. Each category got one or two page protectors depending on the number of documents it held. This was a fairly easy binder to organize and it will help in the future when I'm trying to find our photographer's printing license or remember how much we spent on that delicious cake....


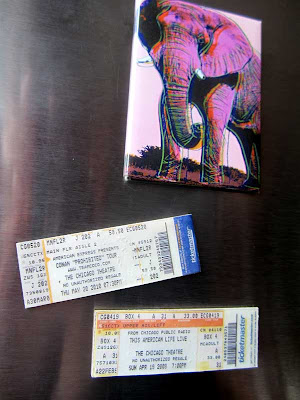
Next, I put together the trip binder. I sorted through all the stuff in this folder and divided it by trip. I kept all of the ticket stubs separate because I'd like to do something special with those eventually. Here are a couple ideas...


Ticket Stub Magnets
Image Via
Ticket Stub Memory Box - Wall Hanging - FREE Shipping!
Image Via

Each trip went into its own page protector so when I (someday) put together a scrap book or project, all our keepsakes will be protected and in one place.


Last, I tackled the manual mess.


I started by sorting through all the manuals and dividing them into categories as well: Furniture; Appliances; Electronics; and Miscellaneous.


I went through each category and made sure that we still had each particular item and then put each category into it's own page protector (or two).


I think I'd like to go back and expand this binder when I have time to put each manual in it's own protector and divide the binder into more than four categories. But for now, this is a vast improvement from where we were before:


Before!


After!


So that concludes my paper pile management project. I haven't decided what to do yet with our tippy plastic file cabinet. It might just get donated to Goodwill. We'll see. But I've been keeping up on our filing much better and I know exactly where to find the information I'm looking for. Ahh, that feels good!

How do you manage your paper piles?

Monday, January 6, 2014

Creating a Cleaning Schedule

I've always taken pride in having a clean house. Though it's not really much about pride - it's more about a slight compulsion to have to have a clean house. I feel so much better and more focused when everything has a place and is in it's place. Over the last few months, however, I've noticed that I've felt more and more stress about the cleanliness of the house. With both the Mister and I working full-time, him in school, me working on the blog/business, and our other activities - keeping up on the cleaning is just not happening. While I'm satisfied that we have clean clothes to wear to work each day and you can safely walk across most of the floors in our house, the detail things are just not getting done and this is driving. me. crazy. Instead of having a crazy breakdown, I sat down to think about how to tackle this problem. That's when I decided to make a cleaning schedule.


I make multiple lists everyday. Lists of what I need to accomplish at my 9-to-5 job, what I need to do when I get home, lists of blog post ideas, lists of items I need at the store, etc. I make lists because I'm motivated by lists. So I figure a cleaning list might help motivate me to clean. It's worth a try!

I did some extensive research online for ideas, designs, formats, etc. I decided to go with a dry erase option - putting the list/schedule in a picture frame. I found a nice square frame in a box downstairs that hadn't been used since we moved into our house. It works perfectly. 

To start this project, I made a list of every possible cleaning chore I could think of. I mentally walked through every room in the house and thought about what surfaces needed to be cleaned. Then I divided this list up into tasks that I wanted to complete daily, weekly, monthly, quarterly, bi-annually, and annually. I had to guess on some things. For example, I'm not sure monthly is often enough to scrub the stove top, but I'm willing to try it. 


Then I went through each section and determined the best time to complete a task. So for our annual cleaning jobs, I chose May to give the garage a good cleaning because cleaning the garage in January in Michigan just doesn't sound fun. Again, I tried to determine the best possible time to do each task, but this schedule is flexible. If something doesn't work, I can rearrange things instead of getting down on myself. 


Then came the hard part. I debated over how to organize this list. First, I considered having just one sheet that listed each category and the tasks in that category. I'd keep it similar to my draft above, noting which month to complete which task. But then I thought back to that whole motivation factor. Knowing me, I'd find a reason to put off each monthly task until the end of the month, leaving me with a few very stressful days at the end of the month cleaning like a maniac and that's what I'm hoping to avoid. So I settled on making a calendar. I used Excel and made a separate tab for each month. I created a basic layout and copied it on each tab and then just started filling in tasks according to my original list. It took a bit of tweaking and, for a moment, seemed like way too much work. But I found myself anxious to get it done so that I could start with it right away. That was encouraging. 


Once I had it the way I thought would work best, I printed the current month. I figured I'd only print one month to start in case I found something that really didn't work for me. That way I wouldn't have to reprint 12 sheets when I changed something. I hung the frame in our kitchen closet and have a spot there for a clipboard that will hold the other months when they're not in use. 


I'm hoping this schedule will allow me to keep the house clean to my high standards. And, maybe it will even encourage the Mister to help out. He tends to be motivated by lists too!

So I'm curious - are you a neat freak like me? How do you keep your cleaning on track?

Friday, January 3, 2014

Holiday Decor Organization

Happy 2014 to you! I don't know about you, but by the time the New Year hits, I'm ready to pack up Christmas and get the house back in order. This year, the Mister and I got to work on New Year's Day and "undecorated" Christmas. 

"Haste Makes Waste" has been the theme of my holiday packing in years past. In my haste to pack up all the Christmas decorations, I wasted a ton of usable space. I would end up with oddly packed boxes and bins that took up way too much storage space throughout the rest of the year. So I thought I'd share some tips to keep all that holiday decor organized. I hope it helps you as much as it has helped me!


Wreaths and Greens

Wreath boxes are a great way to store holiday wreaths. The boxes protect them from getting smashed or bent by other boxes and bins of decor items. They come in all different sizes and materials depending on your needs. Canvas or polyethylene bags protect wreaths from dust and critters but may not prevent squashing by other heavy items. Plastic bins, on the other hand, will provide protection from dust and will also allow other items to be stacked on top. 

Product DetailsProduct Details


If a wreath box isn't in your budget, consider wrapping your wreath in a large plastic bag like a garbage bag and hanging it on a wall in your storage area. This will prevent it from getting dusty and dirty and will keep it out of the way of other heavy items.

Greens can be stored in the same way - stashed in a wreath box or hung up in plastic bags. 

Ornaments

Storing ornaments will, of course, vary by the type and number of ornaments you have. Our tree consists of some traditional Christmas bulbs as well as ornaments that were gifted to me growing up so there are all sorts of shapes and sizes. 

Snapware makes a "snap n stack" ornament storage container that is great to store ornaments. It has three layers with cardboard dividers already in it. This baby holds 27-48 ornaments depending on their size! It has a nice top handle to carry it by as well. You could also DIY a similar item by using strips of cardboard or plastic cups inside a plastic tote. When we got married, we kept the empty boxes that our dishes came in. This year, I used those to DIY a couple of my own ornament organizers. I just used strips of cardboard to separate the ornaments. Getting rid of the individual boxes that each ornament came in saved me a TON of storage space!

For simple Christmas bulbs that aren't glass/breakable, a gallon size ziploc bag (or two) works great. These bags can be slid into the nooks and crannies of a plastic storage tote relatively easily. 

Wrapping Paper & Ribbon

If your Christmas wrapping paper is especially Christmas-y, then there probably isn't a need to have it mixed in with your general wrapping papers all year round. A simple low profile wrapping paper bin is a great place to store these seasonal items. This one holds up to 8 rolls of wrapping paper, plus has compartments for ribbons and bows. It could be slid under a bed or into a narrow storage compartment and will keep your wrapping goodies safe until next year. I actually found these at our local Aldi store for $7.99, while supplies last! This one is round and holds up to 9 rolls of wrapping paper and has a separate compartment at the top for ribbons and bows. It would also slip into an open space in the storage area. If you're more into using gift bags and need to store those until next year, this hanging gift bag organizer fits easily into a closet until you need it again. 


Lights & Garland & Beads (Oh my...)

Christmas lights are my nemesis. It baffles me every year how we can take a perfectly working strand of lights off the tree, store them, and when we take them back out the following year 3/4 of the strand refuses to work. But buying all new lights every year just isn't in our budget so I try to store them as safely as possible hoping they'll come out of hibernation burning bright next Christmas.

There are light reels that you can buy that allow you to wrap up the lights easily and store them in a protective case. And of course, you could use those same reels for garland or beads. For a little bit of a cheaper option, there are very simple wind-ups that allow you to do the same thing but don't come with a case. If free is your thing, use empty wrapping paper tubes or paper towel rolls to wind your lights or garland around. Cutting a slit into each end allows you to tuck the end of the strand into the tube - then just wrap the strand around the tube and tuck the other end into the other slot. These can be laid in a plastic storage tote or just stood up in a storage area. 


Other Decor

For all other holiday decorations, I lean towards stack-able plastic storage totes. Fragile items get wrapped in newspaper or tissue paper. Heavier items go on the bottom and blankets, stockings, holiday towels, etc go in between items to prevent breakage. 

It's easiest for me to store all my holiday items together in our under-stair storage area in the basement. But if you have a lot of holiday decor, it may be easier to pack and store your decor by room. Bedroom decorations can go in an under-bed container. Bathroom items could be stored on the top shelf of the linen closet. Kitchen items could be stashed high up in the pantry, and living room or dining room decor could be stored in pretty baskets, fabric storage drawers, or ottomans. 

This year, using some of these tips and tricks, I was able to pack all of our Christmas decor into two large plastic totes and one box. These items are stacked neatly under the stairs and easily accessible for next year. 


Whatever needs you have for holiday decor storage, there are a lot of innovative product solutions out there. And, if you're not in the market to purchase anything, take a detailed look around your home and you're sure to find some simple and free storage solutions to protect all of your special holiday items.

Do you have any creative ways to store holiday items?

Note: Some of the above links may be affiliate links, meaning, at no additional cost to you, I may get a small commission if you make a purchase.  The affiliate program does not affect my decision of what products to share. I only feature items I would link to with or without an affiliate link. These items and my opinions about them are my honest to goodness personal thoughts and feelings. The Amazon Services LLC Associates Program is an affiliate advertising program designed to provide a means for sites to earn advertising fees by advertising and linking to Amazon.com. Thanks for your support! 
Related Posts Plugin for WordPress, Blogger...