Showing posts with label Closet Organization. Show all posts

Wednesday, October 8, 2014

How to Purge a Wardrobe in One Year

One year seems like a long time for a purging project, doesn't it? But I must tell you, this year long wardrobe purge I'm working on has been my most successful attempt at reducing the amount of clothing I own. If you missed the first three parts of this process, you can catch up here, here, and here

The end of September marked the end of the third quarter so it was time to clean out the summer stuff and find some fall fashions. After a relatively cool summer and a sudden dose of fall here in Michigan, my closet got a little out of hand this time around. 


My fall jackets crept in a little early but I wasn't quite willing to ditch the summer dresses yet. And finding something to wear on a casual weekend was almost impossible when the day started out around 45 degrees and ended up somewhere in the low 70's by the afternoon. Plus, I'm still picking away at our bedroom remodel so all of those items are stashed in the bottom of the closet. I was really glad that it was time to clean out and start over.


Like before, I started by emptying everything out of the closet. Anything I didn't wear over the last three months went directly into the donate pile. Items that were 100% summer items, that did get worn throughout the last quarter, went into the pack away for next summer pile. Then I went through what I had left and picked items I wanted to keep for fall. 


After that, I went to the "second closet" that I'm attempting to eliminate and went through any summer items left in there that didn't get worn and added those to the donate pile. I also picked through any fall/winter items and if I didn't feel like I wanted to add them to my select 33 items, I left them alone. I didn't want to get rid of them yet because, sometimes, the items I pick just don't work or I don't like them as much as I thought I did and I end up trading something out.

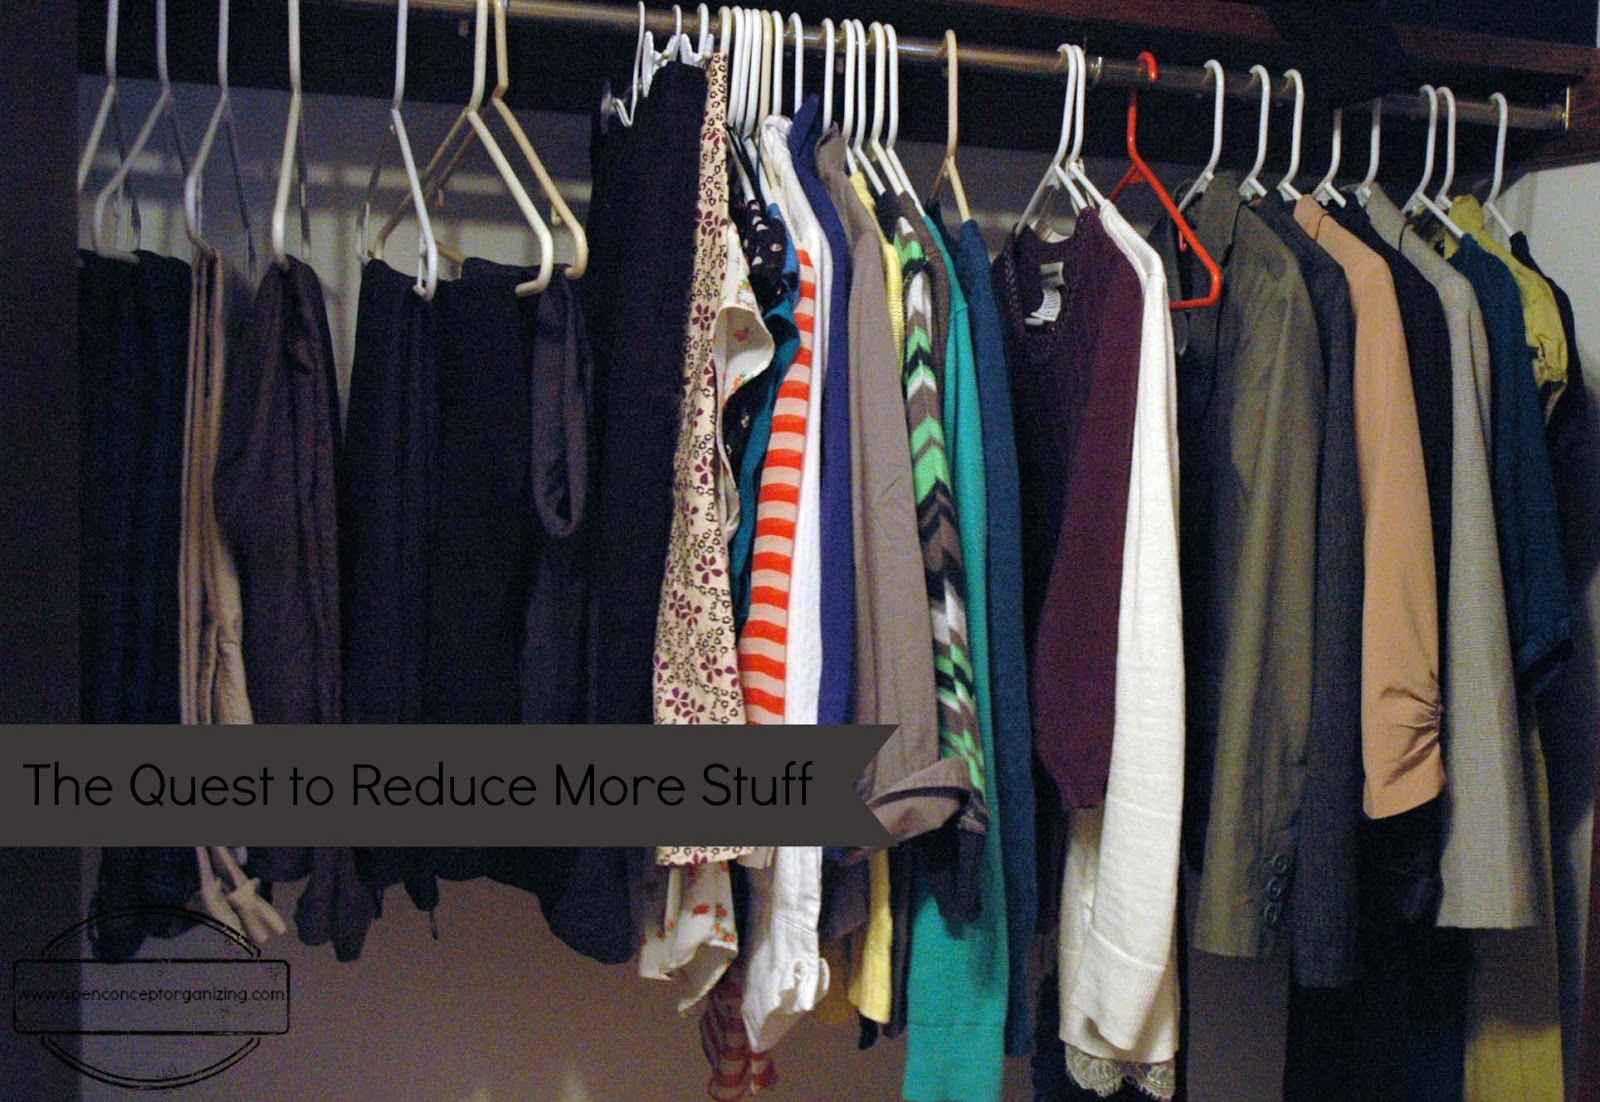
I also did something different this time around. I hung my 33 selected items in the closet backwards. In other words, instead of hanging the hanger on the bar the normal way, I turned the hanger around and hung it backwards. As I wear things, I will put the hanger back the normal way. If, at the end of this quarter, there are any items still on backwards hangers, I know for sure that I never wore that item and I can certainly get rid of it. 

In the end, I had a decent donate pile and a small box of summer stuff to store until next year.


This quarter is a bit more exciting because it's the last quarter of the project. At the end of the year, I will have cycled through my entire wardrobe and I will have a really good idea of what items to keep and what items to add to the last donate pile (which should be pretty big). My ultimate goal is to easily fit my entire wardrobe into one closet and to love everything that I own.

Throughout this process, it has become very clear what staple items I wear very often. This helps me when I go shopping because I know if I want to buy a pair of work pants for example, spending a bit on a really nice pair of black pants will pay off because I wear my black dress pants every week

I've set my goal for this project and I've also set a reward for myself. At the end of this process, I really want to add a built-in closet organizer to the closet, treat myself to all new matching hangers (that might sound crazy, but it helps in keeping a neat and organized closet), and add a few new items to my wardrobe. 

If you want to learn more about Project 333 and start an exciting wardrobe purge yourself, click here. Happy fall to you all!

How do you keep your wardrobe organized and manageable? Have you put away your summer stuff yet?

This post was shared in a link party at:

ABFOL One Project at a Time


Wednesday, September 24, 2014

Preserve Your Memories: Create a T-shirt Quilt

My Mister has one million t-shirts.

Not really. But it feels like one million.

He wears five of them.

What do we do with the other 999,995? Store them in his closet of course!

Over the past year, I’ve been cleaning out my closet bit by bit each quarter to drastically reduce the amount of clothing I own. You can read about that here, here, and here. Each time I clean out my closet, I take a few minutes to re-organize his closet. Re-organize means take out one million t-shirts. Fold one million t-shirts. Sort one million t-shirts by color. Return one million t-shirts to his closet. 

The last couple times I’ve gone through this process, I’ve tried to pull out a handful that he doesn’t wear and that don’t have sentimental value and, with his consent, have donated them to someone else’s one million t-shirt collection. But a handful at a time still leaves us with a lot of t-shirts.

A good portion of his t-shirt collection is made up of what I would call sentimental shirts. Shirts he got for running a race. Shirts he got from his high school sports teams. Shirts he got for all the different places he’s worked. Shirts he’s got on vacation. Shirts he’s got from concerts. It’s hard to get rid of these because they have some sentimental value; some meaningful memory attached to them.

So what is one to do with all that sentiment? A t-shirt quilt!


This week we are celebrating our two year wedding anniversary (Yay!). Now, I’m not an extremely traditional girl, but I think it’s fun to follow the list of traditional wedding gifts because it offers a challenge to come up with something meaningful in a specific category. When I found out year two was cotton, I was stumped. Sure, I could get him some nice lounging pants or a new dress shirt, but that’s not very romantic.

Then the light bulb went off. T-shirts!

What better way to celebrate the love I have for my mister than celebrating who he is and all that he has accomplished? So I secretly dug out a pile of his t-shirts that fell into that sentimental category and planned to put them together into a t-shirt quilt for him as his anniversary gift.

I looked online for patterns, tutorials, ideas, etc and I actually found a lady who will make the quilt for you… but I couldn’t bring myself to spend that much money and I thought it would mean more if the quilt was hand made by yours truly. Now, I’m not a professional sewer by any means. My skill set falls in the very beginner level. But with the help of some great patterns and tutorials online I was able to follow the process and put a quilt together pretty easily!

A little cutting...


A little sewing...


And ta-da!


He was very excited (even though it wasn’t completely finished on our actual anniversary). He said I should have made it bigger! Now that I have one quilt under my belt, I just might venture into making a larger one. Maybe a concert t-shirt quilt or a vacation destination quilt.

If you’re interested in making your own (or having one made for you), here are the links I found most helpful:

Seams To Be You and Me - a great tutorial available online or in PDF 

Instructables - a tutorial without the sashes in between blocks

Maiden Jane - a PDF pattern you can purchase or the option to send in your shirts and have a quilt made for you


Do you have any creative ideas to contain a growing pile of t-shirts?

This post was shared in a link party over at:

     30 Handmade Days     ABFOL One Project at a Time

Wednesday, August 20, 2014

How I Organized Our RV For Under $40

After spending nine days in our new-to-us RV, it was clear that some organizing systems were going to be necessary. Thankfully, organizing doesn’t have to be expensive.


When I need an organizing item, I shop my house first. Then, if necessary, I go to the dollar store or the thrift store with an open mind, and I usually can find something that will work. Sometimes finding a way to use a product other than for what it was originally intended will save you tons of moo-lah.

For example, I wanted to use an over the door shoe organizer in the bathroom to store toiletries, but the ones I found were too wide or too long or too expensive. Instead, I found a jewelry organizer for just $6 that works perfectly. It hangs on an over-the-door hook we already had.


To maintain order in the medicine cabinet, I picked up some narrow pencil baskets at the dollar store (3 for $1) to corral items and keep them in place while we travel. 


And, to avoid packing 7 different bottles of medicine every time we go camping, I also grabbed a weekly pill organizer from the dollar store and filled each pod with a different over-the-counter medicine – Advil, Benedryl, Pepto Bismal, etc. – labeling it clearly with a Sharpie.


A dollar store toothbrush holder with a little Velcro holds our toothbrushes and cups easily accessible on the counter and keeps them in place.


In the bedroom area, I found a couple fabric boxes lying around the house unused so I stashed those in the over head cabinets to hold things like bathing suits and pajamas. 


We had some hanging shoe organizers stuffed into a closet in our basement and, even though I’ve cleaned out those closets multiple times, I just couldn’t bring myself to ever get rid of them. I grabbed them and hung them in the hanging storage area and they now hold extra sheets, towels, and tablecloths.


I call hanging on to things part-hoarding, part-proactive thinking. The Mister calls it a gift. That’s why I love him.

Our food storage cabinets were organized with some baskets and bins from the dollar store keeping things from sliding around while traveling and making it much easier to find those marshmallows when it’s s’more time!


The first time I opened the refrigerator door after driving to our very first camping destination, I looked like a poorly trained circus juggler so I added some more baskets and bins in there and everything stayed exactly in its place on our next trip!


We really do camp with more than water and beer.... :)

We put our super old (and super small) TV/VCR combo in the trailer in case we have rainy days and feel like watching a movie. Our movie selection got slid into an overhead space. A tension rod ensures everything stays in place while we’re cruising down the road while a Velcro strip holds the remote in place when it’s not in use.


Deciding on my favorite organization tool in the RV is a tough one, but it definitely comes down to the paper plate dispenser and the sock organizer. 

I’ve never been more excited about a sock organizer in my life.

I used the sock organizer to hold our glasses, cups, and mugs in place; they didn’t budge! 


But, the paper plate dispenser does save so much cupboard space and makes it super easy to grab a plate when working in the kitchen or grabbing a quick snack. I say it’s a tie!


Our melamine plates did slide around a lot on our first trip so I was looking for something that would keep them all together and in place. I found a used Martha Stewart desk organizer at the thrift store for $2 and the plates fit perfectly!


To save counter space, I grabbed a shower caddy from the dollar store and hung it on the kitchen wall with a command hook. It's now our fruit holder! 


Our pots and pans are corralled under the sink and the lids are slid into a paper filing rack for easy access. Everything is kept in its place with a couple tension rods which can easily be removed while we’re settled into a camp site and put back in when it’s time to travel.


The tall cupboard by the entry has a ton of space but things often get lost because it is such a deep cupboard. Foil, plastic wrap, and sandwich bags are kept together and close to the front in a used magazine rack. 


Plastic bags for trash or doggy messes are kept in a dollar store cereal container.


A silverware organizer keeps things like solar lights, match lighters, and small tools handy in a way that keeps them from sliding all over.


The under the table storage is contained with two laundry baskets from the dollar store. While they work great, I might seek out some rectangular baskets to better utilize that space in the future.


I found some wall hooks at the dollar store and thought they'd work great to hang our dirty shoes on instead of them being strewn across the floor and tripped on. Since I wasn't 100% sure they would work, I didn't want to screw them into the wood paneling so I grabbed a couple more command hooks to hang them. Surprisingly, they worked great!


Outside, some heavy duty command hooks keep our cords and hoses off the floor in the under-storage area, making room for camp chairs and other larger items.

We used large utility hooks, often used to hold brooms or mops, to store our kayak paddles and broom on the side of our under-storage area. They are now out of the way and protected from being squashed by heavier items we stow under there. It’s not always good to be short vertically challenged, but for installing these hooks, it was a huge blessing.


$40 later our RV is adequately organized! For more RV organization tips, be sure to follow me on Pinterest!

How do you keep your camping gear in order? What items do you use outside of their intended purpose?

This post was shared in a link party over at:


The 36th Avenue

And, this post was featured over at:

   ABFOL One Project at a Time

and at

I'm An Organizing Junkie
http://orgjunkie.com/2014/09/eliminate-clutter-organized-rv-efficient-craft-room.html

Monday, April 21, 2014

The Continued Quest to Reduce "Stuff"

Can you believe the first quarter of the year is over already? Time flies when it's freezing cold and snowy outside... Not really. But time does seem to be going by quickly!

Way back in January, I shared my experience with an internet phenomenon called Project 333. The idea is that you choose 33 items to create your wardrobe for three months at a time. At the end of those three months, you can select 33 different items or add and subtract from your original 33 as necessary. The project states that these 33 items should include clothing, accessories, jewelry, outerwear, and shoes but not everyday jewelry like a wedding ring, underwear, at home lounge wear, sleep wear, or workout clothing. Then, after you've completed four cycles of this project (12 months) it should be very clear what items in your wardrobe you should keep and what items you can do without.

I wittled my wardrobe down to 33 clothing items in January and then added in five accessories and five pairs of shoes. I tweaked the program for me a bit for a couple reasons. First, my clothes were out of control but my outerwear, shoes, and jewelry are items that I don't have a ton of, relatively speaking. Second, my day job requires me to dress pretty formally which means I need jackets, pants, and skirts to get me through five days without repeating. Project 333 is not meant to be a "project of suffering." It's meant to be helpful. So these tweaks are what I felt would help me the most.

So it's been three months. Where am I at?


I was really surprised that I managed to go three months with only 33 clothing items in my closet. I was also surprised at how easy it was to pick out my clothes each day. Before purging my closet, I would stand in front of it depressed, constantly complaining about how I had nothing to wear. I don't think I had that conversation with myself once over the last three months. Because my 33 items were picked from my "love" pile, any item I picked was an item I loved. So, everyday I got to wear clothes I enjoyed and that made me feel good. I thought for sure I'd get bored, but surprisingly, I made it. I did swap out one pair of pants about half way through February because a pair I had originally selected were not working for me. 

After three months, here is a picture of my closet:


Aside from a couple rogue hangers, it's still organized and easy to find all the hanging items. 


To start phase 2 of this project, I went through my 33 items and decided three things:

1.) What items do I still really love and want to store for the next fall/winter season?
2.) What items do I still really love and want to keep in the closet for the next three months?
3.) What items didn't really work for me over the last three months that I can now get rid of?

Because we live in Michigan, my fall/winter wardrobe varies from my spring/summer clothes. So all those big bulky sweaters had to be packed up. I also packed up my wool pants, wool jackets, and fall/winter dresses. I loaded them into a box and labeled them Winter. Here is my "keep for next winter" pile:


I picked two items to donate from my original 33. This was tough, but I realized that I rarely wore them even when they were part of a very select few available items. I also kept about 10 items to transition into spring. Once I had those 10 items, I had room for 23 more. 

I went back to all the clothes I had packed away in January and pulled out anything that was spring/summer appropriate. Then I followed a similar process as in January, separating those items into things I love, things I liked, and things I could get rid of. From the first two piles, I picked my final 23 items. Here is my spring (April - June) selection:


I found quite a few things that I wasn't willing to part with back in January, but was now able to say it's time to get rid of them. So I combined all of those items into an overflowing box to take to donate.


The amount of room taken up by stored clothing in our home has already decreased noticeably. What's even better is that getting dressed this morning was exciting because it felt like I had just shopped for an entire new wardrobe. I'm really excited to continue on this journey and especially excited to see how many items I end up with in December when this project is complete.

Check out the Project 333 website if you're interested to try something like this yourself. I'm happy to answer any questions you have as well!

Here's to decreasing the amount of stuff in our homes and increasing organization!

Monday, January 27, 2014

Creating a Cleaning Closet

Saving money on natural cleaning supplies and having a nice place to store cleaning rags has helped cleaning  to be more enjoyable, but there is still something bothering me - the mess under the kitchen sink. All of our cleaning products get stored in that dark hole along with dishwasher detergent, a dish drying mat, pet shampoos, pet brushes, bug sprays, squeegees.... ugh, the list goes on and on. When I try to get out the furniture polish, I knock over three other bottles. It's just not working.


I mentioned here that our home is not lacking in storage space but that space is not being utilized as well as it could be. We have a pantry in our kitchen along with an ample amount of cabinet and drawer space. In addition, we have a nice closet with built in shelves that, up until now, has been stashed with a variety of miscellaneous items including plastic bags, reusable bags, dog food, small kitchen appliances, light bulbs, extra paper towel and bulk kitchen items, a mop, a fly swatter...ugh, again.

Our cleaning products were stashed under the sink, our cleaning rags were in the linen closet, our vacuum was in a closet in the living room, and our mop was in the kitchen closet. And I call myself organized....? A revamp was long overdue! I decided it made sense to store all of our cleaning products and supplies in the kitchen closet. It had the most space and it's located central to the rest of the house. Here is a before picture of the space:


Again, not completely a disaster, but not efficient. I started by emptying the closet completely. I wiped down the shelves and hand-washed the floor. It was looking better already! Then I attacked the organization of it all. I sorted through the light bulbs, many of which were left to us by the previous owners, and put all the ones that we'd never use into a donate pile. The rest got put into a long, flat plastic tote and stashed in the bottom of the linen closet, under the basket of paper products.

The bread maker got moved downstairs because we NEVER use it. I couldn't quite convince myself to donate it yet because I'd like to use it, but if it sits downstairs unnoticed for a bit, I will commit to getting rid of it. A couple other kitchen appliances got moved elsewhere in the kitchen. I decided to leave the crock pot in the closet because it's the easiest place to access it. It's heavy and bulky and I use it often, so storing it up high or deep in a cabinet doesn't make sense.

Next, I pulled out all of cleaning supplies from under the sink. I was so excited to get this space cleaned out that I forgot to take a before picture (sorry!). But here is what was stored in that dark hole:


I sorted through the products and consolidated them accordingly. I cleaned out the cleaning caddy and put the products I wanted to keep (and use often) inside. Then I stashed the cleaning caddy on a shelf in the closet. It fit perfectly! The extra paper towel went back in the cabinet and the mop and broom were hung on existing nails. This left the perfect spot for the vacuum!


Our cleaning schedule hangs on the door and all the products I need are right there! I grabbed the cleaning rags out of the linen closet and put them in this new cleaning closet instead. Take a look under the sink:


It's so bright and clean and happy now. It holds dish washing supplies and some larger rags along with a few miscellaneous cleaning products that don't get used often. The pet supplies got moved to the drawer of our pet food bin, which is working superbly.

This revamp was completely free and it has lessened my stress significantly. Those are the best projects, don't you think?

How do you wrangle your cleaning supplies? Is your under-the-kitchen-sink space a dark hole too?
Related Posts Plugin for WordPress, Blogger...