Thursday, February 27, 2014

Super Easy DIY Dog Bed

I love my dog… I love my dog… I love my dog…

I recite this to myself as I clean up stuffing, feathers, foam, and fabric.


When I buy Mando a bed, he eats it. But when Mando sleeps on the bare floor, I feel sad. Such a dilemma! I needed a solution that would give him a bed for little to no money so that, if he destroyed it, I wouldn't be mad. 


I had three old pillows stuffed in a basement closet. I had no intention of ever sleeping on them, but I didn't want to throw them in the trash and add to the landfill. 

It didn't seem hygienic to donate them for someone else to sleep on. 

I considered using them to stuff pillow shams in the guest bedroom. I've been considering that for over a year and haven’t bought shams yet.

I decided the dog could sleep on the pillows.

It seemed unsightly to just throw three dirty old pillows on the floor and, it seemed unlikely that a 76 pound golden retriever would lie still on three separate pillows to keep them in place. I needed a way to pull it all together.

I found three used pillowcases at the thrift store for $3. They generally matched and they were boy colors. It’s important to give a boy dog a bed made of boy colors.


I used my mom’s ancient sewing machine to sew the three pillow cases together. It took me 37 minutes to get the machine to work correctly and 9 minutes to sew the cases together.


I stuffed one pillow into each case and laid it next to our bed, where Mando currently sleeps on the bare floor.  


I whispered, “If you build it, they will come,” and sure enough, he came running in and laid down on the bed.

It easily slides under our bed during the day and, when we tell him it’s time for bed, he runs right to it and lies down at night.

I really do love my dog, and I’m pretty sure he loves his new bed.


Have you re-purposed an item to meet a need instead of donating it or trashing it?


Monday, February 24, 2014

Creating a Command Center: DIY Cork Board

I love solutions that alleviate more than one problem. I also love solutions that involve drinking wine. This project does both!

As I was putting our command center together, I decided I needed something to hang next to the paint chip calendar because the wall looked a bit bare. 

I didn't just want to add something random that took up space. I wanted something functional. We have a small-ish white board that has been roaming around our house looking for a place to call home for awhile now and I thought it'd be perfect for this spot. But when I got around to hanging it up I realized it was a bit too big. 

Knowing I needed to find another solution, I poured myself a glass of wine and did some brain storming about what would really be functional in this space. I decided that some sort of bulletin board would be best - either a magnetic board that we could post up photos or notes or business cards with magnets or a corkboard that we could do the same thing with except with push pins. I debated back and forth until I remembered a bag of corks that I had found when I cleaned out the DRAWERS in this space. A DIY corkboard? A solution for my wall, a solution for all those scrap pieces of paper floating around, and a solution for the insane amount of corks the mister and I have collected over the years. Genius!


I really didn't want to spend too much money on this project. Well, who am I kidding, I never really want to spend too much money on ANY project... so I started rummaging around the house for supplies. I found a couple picture frames I picked up about a year ago at a garage sale for FREE! And, I found some acrylic paint that mostly matched the color scheme of the command center. I was set.

My first step was to paint the frame. I removed the backing and the glass and covered it in three coats of paint.

Once it was dry, I sat down to watch an episode of American Idol (I'm not sure I can really get into it this year, but nothing else was on) and I spilled out all our corks on the coffee table. I slid the original backing back into the frame, but left the glass out. Then I just started arranging a basic pattern with the corks until I had a row that I liked. I used my mini glue gun to glue the row into place before moving on to the next row. 


This project went pretty fast. The arranging and gluing of the corks only took about 45 minutes. The bottom row was a bit tricky but I ended up having a cork in our bin that had broke in half when we opened the bottle and it remedied the problem easily. 


So cute! I learned a few things from this project. First, cute projects can be done for free. Second, wine helps me brainstorm. And third, we really need to venture out in the varieties of wine we are enjoying because I had a hard time getting different types of corks into the frame. I must have went through a Barefoot and Yellow Tail phase...


Anyway, the board fits perfectly in it's new home and I've already starting pinning goodies onto it. 


I intend to hang both the calendar and the corkboard on the wall - but I have a wall treatment in mind to bring more color into this space first! Stay tuned! 

This project was featured in a link-up at:

Friday, February 21, 2014

Creating a Command Center: Writing Utensil Organization

I'm fearful my mister is a pen hoarder. I like to have a pen lying around here and there for that spontaneous idea or phone number I need to take down. But his hoarding has led to this...


I told him I was pretty sure the pen police would be coming for him soon. I told him there are pen deprived people all over this city because of him. I don't think he took me seriously...

Anyway, to continue to get our command center in order, I decided the insane amount of writing utensils stored in our house must be addressed. 


So, I gathered every writing utensil in the house that I could find. I emptied out all of our "pen holders" and also found the following: a screwdriver, a button, a couple bandaids I wouldn't dare put near an open wound, a key, a raffle ticket, two parachute men, a 2006 key chain, some coin rolls, a pig key ring, a stick of gum, three tubes of chapstick, a bobby pin, a safety pin, and some temporary cement bonding glue. Can you find all of these items below?


Next, I did what any normal person would do - I tested out every writing utensil. Yep, every.single.one. That's normal right?

I threw away anything that didn't work or was real close to not working as well as anything too gross for me to touch to test it out. Then I sorted the remaining items into three groups: work, keep, donate. Work was a distinct group of pens that the mister brings home from work. I am sure no one else in his office is able to write due to a lack of pens and a tight budget. The keep pile consisted of nice pens that I'd enjoy using, a few pencils with good erasers, and some highlighters and Sharpie markers. The rest went into the donate pile. I don't know if people buy pens from thrift stores, but I figured someone could make use of them. 


My next step was to figure out how to store everything in the keep pile. I really like these hanging bucket ideas:


Super cute!
{Image Via}

Command Center
{Image Via}

office nook
{Image Via}

I tried to find some already-made kits but they were a little more pricey than what I was hoping to pay. I picked up a tension rod and some ribbon for about $7 at Jo-Ann Fabrics and grabbed three pencil cups at the dollar store. I used my Cricut and my home printer to create some tag labels and attached those to the pencil cups with the ribbon. 


Then I put up the tension rod across the office desk space and used a level to make sure my buckets wouldn't all slide to one end. I attached each of the three buckets to the rod using the same ribbon. The ribbon has some nylon in it, so I used a candle lighter to melt the knots of the ribbon to keep them from pulling out from the weight of the pens. I also melted the exposed ends of the ribbon to keep them from fraying. 


Finally, I put a portion of the "keep" utensils into each of the buckets. I don't think the tension rod is capable of holding everything I decided to keep. At the same time, I don't think it's necessary to even have THAT many writing utensils in the house. Nonetheless, I will store the remainders in some baskets that I'll show you later. 

I like how the project turned out and I like even more that it was only $10. 


I threatened the mister that the buckets will only hold so much weight - so he should probably be more choosy in which writing utensils he brings home. Is there a Pens Anonymous group? 

The command center is coming along nicely. I still have two or three projects left before it's "done"!

How do you store your writing utensils? Do you have a pen hoarder in your house?

Wednesday, February 19, 2014

Get Your Drawers In Order!

I will start by clarifying that this is not a laundry post or a post about unmentionables. I'm talking strictly about actual drawers and, in this case, drawers that store office supplies. As I work through creating our command center and updating our little home office nook, I wanted to move the bins of office supplies that are currently stashed in our second bedroom into this space. There are three drawers built in to the desk and, up until now, they were used to store.... well whatever we needed to get off the desk, honestly. So I decided it was time to get these drawers in order!


The first order of business was to go through all of the office supplies and decide what we needed, what could be donated, what should be thrown away, and what could better be stored elsewhere. To do this, I made four piles and went through each item one by one. When my four piles were complete, I created a donation bag and put it in my car right away. Then I tossed the things that were trash, and delivered the items that needed to go elsewhere to their final destination. This left me with all the items I hoped to store in the three drawers. I didn't have a lot of containers laying around the house unused so I made a trip to my favorite thrift store to see what I could find. I found some cute colored square bowls, a white ceramic dish divided into three compartments, some old film negative storage containers, and a larger Sterilite container that I hoped to use to store all of our batteries.


I laid out my storage containers on the counter and began placing all those selected items into a container. I had to do and undo a couple times to get each item in an appropriate container, but after a little bit of work, everything had a place.

I picked up some cheap drawer liner at the dollar store and lined all three drawers before placing supplies inside. This way, things will be less likely to slide around and get messy.


Once the liner was in place, I started to arrange the containers. 


The top drawer holds all the items that we use on a regular basis: scissors, white out, binder clips, paper clips, push pins, and staplers. The middle drawer contains small pads of scratch paper, a small screw driver set, and a box of random tools like a putty knife and tape measure. Finally, the bottom drawer holds the container of batteries, matches, candle lighters, and some travel supplies like suitcase locks and a scale. 


The drawers look so much nicer now and it's so easy to find what we're looking for. Stay tuned for more work on the command center coming in the next few weeks!

Monday, February 17, 2014

All In The Name Of Love

Happy Monday! I hope everyone had a terrific Valentine's weekend. Since February is the month of love, I thought I'd take a break from the organizing projects today and share a little more about myself with you - the story that is me and the mister. I promised back here that I'd share the story of how we got engaged, so in honor of keeping promises...here it is!


We did things slightly backwards in that we purchased our home before getting engaged/married, but we had several of those "where is this going" conversations and knew each other's intentions of this being a forever thing. We were scheduled to get the keys to our house on a Monday. I had a lot going on at work, so I decided to work that day and start moving in the evening. My mister, however, was so excited about moving in that he was sure to take Monday off of work and get a head start. We had a pleasant surprise the Friday before that when the previous owners gave us a call and said they were all moved out and the house was all ours as soon as we wanted to come over. I think it took us all of about 5 minutes to get ourselves together and get in the car and speed over to the new abode. We were so excited. Needless to say, a lot of moving happened over the weekend, leaving the mister with not a ton to do on his day off Monday.

He planned to put a couple pieces of furniture together, get a few rooms set up, and relax from a busy weekend. On Monday morning, I got up just like any other day and went in to work. I got a few phone calls throughout the day from him saying how bored he was and how he had nothing to do. It was totally believable because he is the type of person who can't sit still for more than 20 minutes at a time. I kept trying to come up with ideas, but I was running out of tasks to delegate. Quittin' time finally rolled around and I got in my car and headed home. When I pulled into the garage, he came out the front door dressed in a suit and offered to help me carry my things inside. 

Now, you'd think that would have sparked some curiosity in my head - but earlier that day, one of the tasks I delegated to him was to try on some older clothes and decide what he wanted to keep and what he could get rid of. This way, it'd help us organize our closets more efficiently. So I just figured I had pulled into the garage at the moment he was trying on a suit...

He carried my bag into the house and I followed behind. As I walked into the door I noticed some rose petals on the floor. 


Yep, that sparked my curiosity. 

I thought maybe he had planned a romantic evening to celebrate our new home. I hung up my coat and took off my shoes and walked into the kitchen to find multiple vases of red, white, and pink roses all along our kitchen island. Next to each vase was one or two cards or notes we had exchanged over our dating years. (Yes, he kept them!) As I started to wrap my head around what might be happening, I realized there was music playing in the background and at about that same moment he took my hand and started singing "our song" to me. He led me along the vases of past memories to the kitchen table. 


On the table was a plate of sushi, one of our favorite foods to share together. It was sushi wrapped in pink seaweed molded into the shape of a heart. I can hear all the awww's now (or the eww's if you don't like sushi...but stay with me). 


There was also a ring shaped jewelry box sitting there for me. He handed it to me and asked me to open it. I thought to myself, "That's not what you're supposed to do..." but I did it. It was empty! When I looked up, he was down on one knee. I don't remember his exact words because it all happened so fast - but he said some sweet things and then pulled out the real ring and asked me to marry him. Obviously, I said yes! 


He bought my diamond separately and had a band custom designed, so no one else will ever have a ring like mine. I called my mom first, bursting with excitement. She happened to be at the grocery store and I debated waiting to tell her the news until she got home but I couldn't hold it in. She started crying in the middle of the aisle. I still laugh thinking about her standing there on the phone bawling, so excited. While the mister had been sneaky and talked to my dad about a month beforehand, neither one of them let mom in on the secret. Very impressive!

So that's how we became Mr. and Mrs. Well, that plus 9 months of crazy planning, budgeting, food tasting, shopping, etc.... 


I treasure him and his support every single day. I really don't think I could do all that needs to be done without his help. I guess that's why they call it your "other half". Cheers to love (and to organizing)!

Friday, February 14, 2014

A Little Inspiration To Get You Out The Door

I've been working on our entry way for a while now, trying to make it a nice warm welcoming area in the house but also a functional area. When I say "working on", what I really mean is dreaming up big plans in my brain... Our dog food storage was one of the first steps in this area that I took action on, knowing that we'd want to store Mando's food out here next to his dishes. But since then, I haven't really done anything else, somewhat due to a lack of time and otherwise due to a lack of budget. Excuses aside, I was roaming through some of my older pins on Pinterest (you know, all those projects you were sure you'd do but then never did?) and I found this one:


Above the door for when you leave.
{Image Via}

I thought it'd be fun to put some sort of inspiration above the entry door so that, as we leave each day, we are encouraged and, as our guests leave, they feel the same. I threw around several bible verses and a few other favorite inspirational quotes, but I kept coming back to the message in the picture: Do something amazing. Short and simple but yet quite inspiring. 


After a few more internal debates, I finally committed and used my Cricut to cut the letters out of black vinyl. I stuck them up above the door jamb and stepped back to take a look.


I feel inspired already. I think I'll keep quiet about this project and see how long it takes the mister to "get inspired" aka notice the message! (Update: It took him 48 hours!) 

Such a simple and easy project, but it adds a unique happy touch to the space. Happy Friday! Go do something amazing!


Wednesday, February 12, 2014

All Natural Oven Cleaner

Cleaning the oven stinks...literally. Whether the oven can self-clean or needs some elbow grease, the chemicals emitted both ways are enough to make me gag. Nevertheless, I've concluded this isn't a good enough excuse to never clean the oven. (Boo!) According to my cleaning schedule, February is one of the months that nasty task, so I sought out a more natural way to get this smelly job done.


I found a basic oven cleaning formula at Cleverly Inspired and decided to test it out. Here is the recipe:
  • 5 tbsp baking soda
  • 4 tbsp vinegar
  • 3 drops dish soap

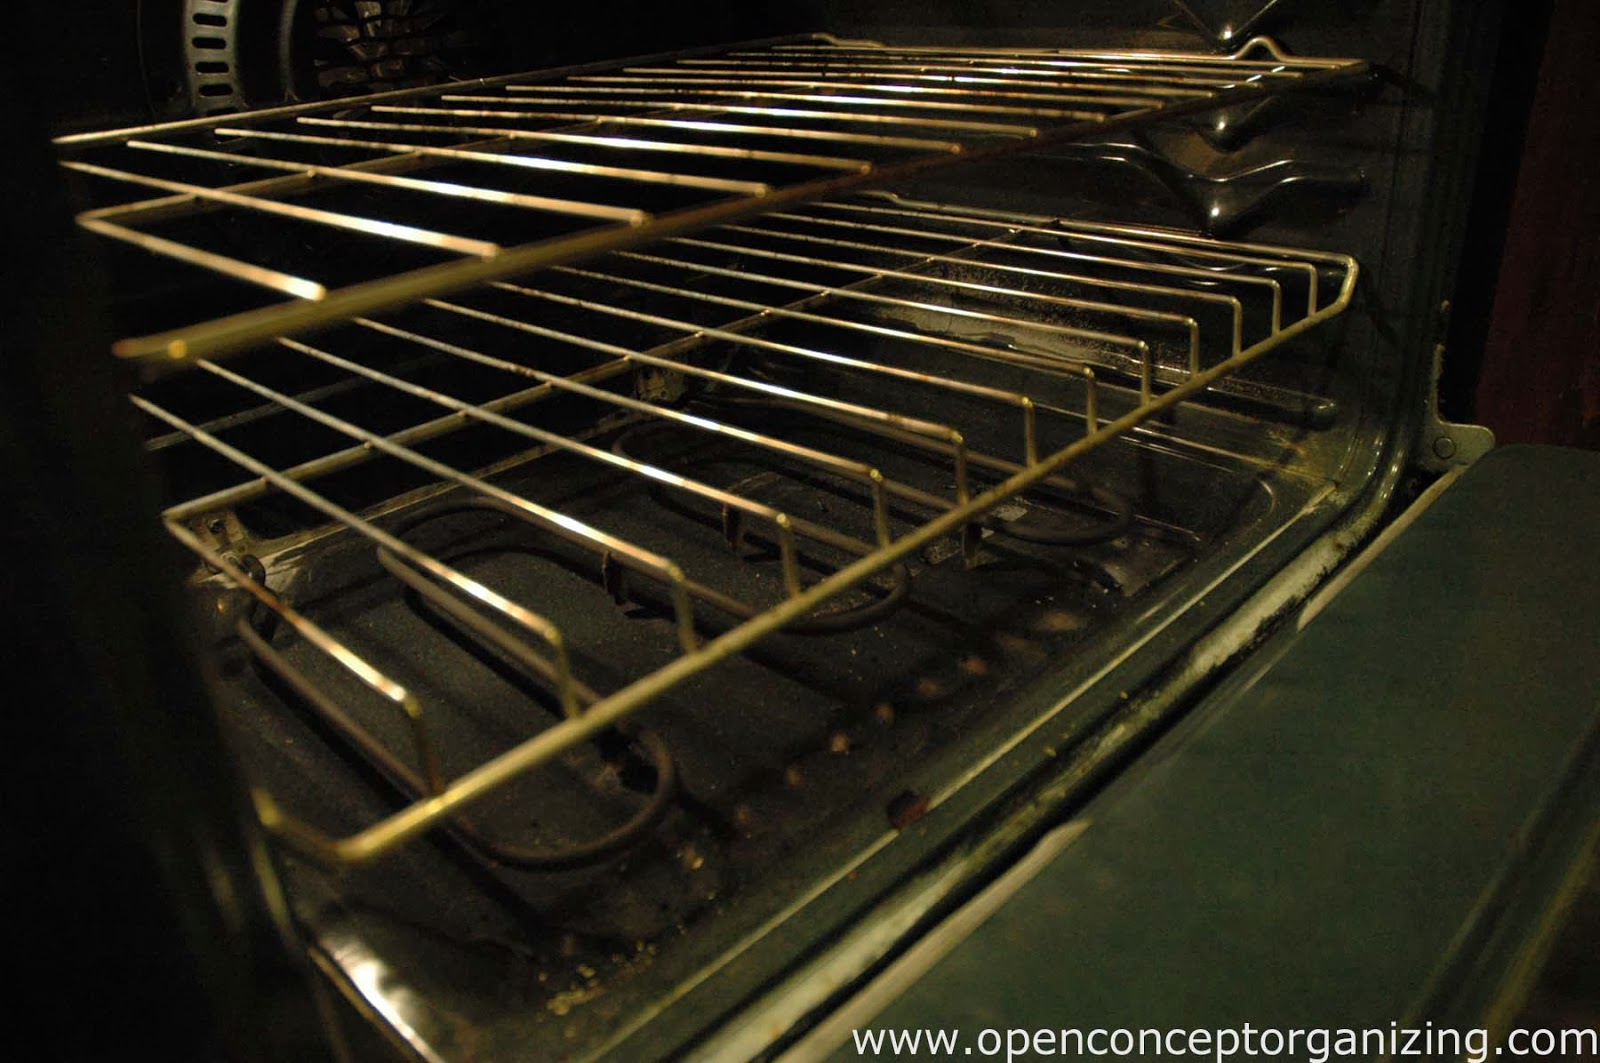
To be fair, here is the oven before cleaning. 


Not too bad... but a few stuck on spots. I mixed the three ingredients into a paste and coated the entire oven with it. The original post says to let it sit for 15 minutes.


I decided to let mine sit for about 30 minutes just to make sure it was good and ready to scrub. I used a regular kitchen sponge to scrub, rinsing often. Overall, the paste really seemed to do the trick. Most of the burnt on spots came off with very little scrubbing. It also seemed to work well on the door and the glass. 

Here is an after shot of the clean oven.


My mediocre photography skills didn't quite catch how clean it really looked, but I am satisfied enough to kick the Easy-Off to the curb and use this method in the future. My cleaning schedule commits to cleaning the oven twice a year. I think I can stick to that!

To see other natural cleaning recipes, check here, here and here.

Monday, February 10, 2014

5 Easy Cleaning Tricks to Make Your Life Easier

As much as I enjoy cleaning and organizing, finding the time to do so can be down right difficult. But with pet hair flying around, and our house being shut up tight for the winter, the cleaning schedule is one I really try to adhere to. This doesn't mean I have to spend hours each day tidying up the house though. Here are five tips and tricks I've found and tried that are saving me time in my cleaning routine!


1. Cleaning the Microwave


I try to clean our microwave once a month and, so far, that seems to be enough. But sometimes you get those glued on specks of food that just don't want to budge. Try putting a bowl or cup of water in the middle of the microwave with a teaspoon or so of baking soda. Run the microwave on high power for 1-2 minutes until the water is close to boiling or just starting to boil. Then, carefully remove the cup of water and wipe down the microwave with a damp cloth. The steam from the water should help to loosen any stuck on food and the baking soda in the water helps to eliminate any odors hanging around inside the microwave. Plus, using just water and baking soda eliminates any chemical smells or reactions that other cleaners might cause inside of a microwave. 

2. Removing Pet Hair From Furniture


It's no secret that we have a dog and a cat running around our abode. Their hair is everywhere! I try to vacuum the furniture at least once a week to keep the pet hair under control, but that's not always enough. The vacuum tends to get all the loose hair off the cushions, but there are always pesky hairs really stuck in the fabric that just don't want to come up. Who would have thought a squeegee would be the answer? Certainly not me! But it works amazing. Just take a dry shower or window squeegee and run it across the cushion. As you can see from the embarrassing picture above, it works to get all those pesky hairs off the furniture! (Note: This seems to work better on textured fabric and did not work as well on our microfiber couch.)

3. Dusting LCD Screens


LCD screens are common in most homes today whether they are on a TV or a computer monitor. It gets confusing sometimes as to safe ways to clean these screens. I've tried to dust our LCD screens with a dry microfiber cloth and, while this works relatively well, the static created by the screen sometimes just won't give up dust particles or pet hair. For some reason, using a coffee filter on these screens seems to do the trick! Just dust the screen off with a coffee filter and it collects the dust and hair from the screen very easily without creating more static. 

4. Cleaning the Shower Head


The shower head is an easy place to over look when you're cleaning. But it builds up mineral deposits and soap scum which will impact your water pressure and water flow in the shower. I've tried chemical based cleaners to unclog our shower heads in the past and, while they seem to work well, the chemical smell is over powering. I'm learning quickly that vinegar pretty much cleans everything and this includes shower heads. I put some vinegar in a plastic baggy and wrapped it around our shower head making sure the entire head was immersed in the vinegar. Then I just gathered the bag at the top and clipped it with a bag clip. I let it sit for most of the day and then removed it and ran the water for about a minute. Looked like new! If your shower head is extra icky, you can try adding a little bit of baking soda to the bag just before you clamp it shut. The chemical reaction between the baking soda and vinegar will help to get really stuck on grime off.

5. Dusting the Base Boards


I try to dust our base boards once a month or so because they do collect a lot of dust and pet hair. As you can see from the picture, our base boards are relatively wide, so the collected dust is very easy to see. Because these boards are so close to the floor where most of the dust and hair fall, they tend to get dusty pretty quickly. I heard that dusting with a dryer sheet keeps surfaces cleaner longer, because it coats them with an anti-static cling film. Worth a try I say! I ran a dryer sheet along all the baseboards in our house and was surprised at how well the sheet actually collected the dust. It left a faint smell good scent along the way too. I may try dusting our furniture with a dryer sheet as well to see if it helps repel dust for larger surfaces too!

These are five easy tricks that you can use around your home to shorten up your cleaning time and reduce the amounts of chemicals you have to use to clean. I hope they've helped you as much as they are helping me!
Related Posts Plugin for WordPress, Blogger...