Showing posts with label Paper Organization. Show all posts

Thursday, March 13, 2014

Recipe Organization

I love food and I love organizing, so you’d think that my recipe collection would be highly organized. Think again. My recipes are a mess. Think one small set of cookbooks + one bajillion food magazines + hundreds of random pieces of paper stuffed into a file folder organizer. Never mind. Don’t think about it. It’s bound to make you nauseous.

As I finished up our command center, I was reminded of the cupboards and shelves surrounding it (and the mess contained in them). My cookbooks currently sit on the shelves and the food magazines and random pieces of paper are stuffed into one of the cupboards. This has always been an area that I’ve wanted to organize; it’s just always felt too overwhelming for me to get motivated. 

I have had a difficult time deciding what organization system to use for my recipes. I’ve looked at online databases, cute recipe cards and recipe boxes, binder systems, etc., and while I’ve liked parts of each, I could never settle on one. When I decided it was finally time to tackle this project, I was leaning towards something colorful and cute. But the more I got into it, the more basic, simple, and streamlined approach won out.


I felt an urgency to get my recipes in order, but my budget wasn’t really sensing that same feeling. I decided to get things organized as cheaply as possible and ended up doing it essentially free.

Here is what I started with:


I rarely ever look through the recipe magazines for new ideas so I set the magazines aside for now. I sorted through all my random slips of paper first. I recycled anything that wasn’t titled (and I couldn’t figure out what the recipe was for), anything I made once and didn’t like, and anything I had once intended to make but now didn’t see that happening. 

Next, I divided up the remaining recipes into categories. I menu-plan each week based on what is on sale. So, for example, if beef is really cheap one week, I put together more beef recipes than chicken to save some cash. My final categories were: beef, breakfast, chicken, desserts, fish/seafood, miscellaneous, pasta, pork, sausage/ham, and turkey.

I thought about buying a large amount of page protectors and just taping or gluing the little pieces of paper onto an 8 ½ x 11 sheet and inserting them that way. But the obsessive organizing part of me wasn’t okay with that solution. I created a template in Microsoft Excel that allowed four recipes to be printed on each page. I actually re-typed each recipe into the template. Now before you roll your eyes at how ridiculous that sounds let me tell you that it literally only took me one hour a day for five days. That’s not really all that bad figuring I ended up with a very streamlined and organized recipe binder in the end. Or so I tell myself…

I re-purposed some old file folders by cutting them in half and adding labels to the tabs. These became my category dividers. Then I just printed out each category, three-hole punched the paper, and stuck it in the binder.


I still might invest in some page protectors for each of the printed pages just to protect them from spills and such. I figure now that all the random slips of paper are taken care of, I can go through the magazines and just rip out pages that I’d like to keep. I can three-hole punch the actual magazine pages and insert them in the binder by category. I don’t see a purpose in keeping all the magazines because there is only about one or two recipes in each that I use. 


I saved any handwritten recipe cards from my grandmothers. I’d like to preserve those someday, somehow. All of the other pieces of paper got recycled though. 

Re-typing these recipes helped me remember all of the yummy meals that I have made in the past and got me really motivated and excited to get back to making them again. They also made me really hungry –so word to the wise – don’t work on a project like this when your tummy is rumbling. 

In the end, I opened up an entire cupboard above the command center. I’m considering moving my stash of cookbooks into the kitchen and reorganizing the bookshelves with other items. We’ll see what happens. I’m sure this recipe binder will be updated at some point in the future, maybe even to something cute and colorful. But for now, it solves the problem I was struggling with and will help my recipe collection to stay organized.

This project was shared in a link party over at:

One Project at a Time Link party - ABFOL

Monday, February 24, 2014

Creating a Command Center: DIY Cork Board

I love solutions that alleviate more than one problem. I also love solutions that involve drinking wine. This project does both!

As I was putting our command center together, I decided I needed something to hang next to the paint chip calendar because the wall looked a bit bare. 

I didn't just want to add something random that took up space. I wanted something functional. We have a small-ish white board that has been roaming around our house looking for a place to call home for awhile now and I thought it'd be perfect for this spot. But when I got around to hanging it up I realized it was a bit too big. 

Knowing I needed to find another solution, I poured myself a glass of wine and did some brain storming about what would really be functional in this space. I decided that some sort of bulletin board would be best - either a magnetic board that we could post up photos or notes or business cards with magnets or a corkboard that we could do the same thing with except with push pins. I debated back and forth until I remembered a bag of corks that I had found when I cleaned out the DRAWERS in this space. A DIY corkboard? A solution for my wall, a solution for all those scrap pieces of paper floating around, and a solution for the insane amount of corks the mister and I have collected over the years. Genius!


I really didn't want to spend too much money on this project. Well, who am I kidding, I never really want to spend too much money on ANY project... so I started rummaging around the house for supplies. I found a couple picture frames I picked up about a year ago at a garage sale for FREE! And, I found some acrylic paint that mostly matched the color scheme of the command center. I was set.

My first step was to paint the frame. I removed the backing and the glass and covered it in three coats of paint.

Once it was dry, I sat down to watch an episode of American Idol (I'm not sure I can really get into it this year, but nothing else was on) and I spilled out all our corks on the coffee table. I slid the original backing back into the frame, but left the glass out. Then I just started arranging a basic pattern with the corks until I had a row that I liked. I used my mini glue gun to glue the row into place before moving on to the next row. 


This project went pretty fast. The arranging and gluing of the corks only took about 45 minutes. The bottom row was a bit tricky but I ended up having a cork in our bin that had broke in half when we opened the bottle and it remedied the problem easily. 


So cute! I learned a few things from this project. First, cute projects can be done for free. Second, wine helps me brainstorm. And third, we really need to venture out in the varieties of wine we are enjoying because I had a hard time getting different types of corks into the frame. I must have went through a Barefoot and Yellow Tail phase...


Anyway, the board fits perfectly in it's new home and I've already starting pinning goodies onto it. 


I intend to hang both the calendar and the corkboard on the wall - but I have a wall treatment in mind to bring more color into this space first! Stay tuned! 

This project was featured in a link-up at:

Wednesday, February 19, 2014

Get Your Drawers In Order!

I will start by clarifying that this is not a laundry post or a post about unmentionables. I'm talking strictly about actual drawers and, in this case, drawers that store office supplies. As I work through creating our command center and updating our little home office nook, I wanted to move the bins of office supplies that are currently stashed in our second bedroom into this space. There are three drawers built in to the desk and, up until now, they were used to store.... well whatever we needed to get off the desk, honestly. So I decided it was time to get these drawers in order!


The first order of business was to go through all of the office supplies and decide what we needed, what could be donated, what should be thrown away, and what could better be stored elsewhere. To do this, I made four piles and went through each item one by one. When my four piles were complete, I created a donation bag and put it in my car right away. Then I tossed the things that were trash, and delivered the items that needed to go elsewhere to their final destination. This left me with all the items I hoped to store in the three drawers. I didn't have a lot of containers laying around the house unused so I made a trip to my favorite thrift store to see what I could find. I found some cute colored square bowls, a white ceramic dish divided into three compartments, some old film negative storage containers, and a larger Sterilite container that I hoped to use to store all of our batteries.


I laid out my storage containers on the counter and began placing all those selected items into a container. I had to do and undo a couple times to get each item in an appropriate container, but after a little bit of work, everything had a place.

I picked up some cheap drawer liner at the dollar store and lined all three drawers before placing supplies inside. This way, things will be less likely to slide around and get messy.


Once the liner was in place, I started to arrange the containers. 


The top drawer holds all the items that we use on a regular basis: scissors, white out, binder clips, paper clips, push pins, and staplers. The middle drawer contains small pads of scratch paper, a small screw driver set, and a box of random tools like a putty knife and tape measure. Finally, the bottom drawer holds the container of batteries, matches, candle lighters, and some travel supplies like suitcase locks and a scale. 


The drawers look so much nicer now and it's so easy to find what we're looking for. Stay tuned for more work on the command center coming in the next few weeks!

Wednesday, February 5, 2014

Creating a Command Center: Mail Organization

I believe there should be some law or rule about not having to work on your birthday... I also believe there should be some law or rule that says it cannot snow on your birthday. Yes, today is my birthday and yes I did have to work and yes there is a lot of blowing and drifting snow outside. Alas, I am another year older and another year wiser. Thank you to everyone that has expressed warm birthday wishes and thank you especially for taking some time to read my blog. I truly appreciate it from the bottom of my heart. Now... on to the organizing!

About six months ago, I purchased a hanging organizer from Thirty-One. I wasn't exactly sure what I was going to do with it, but I figured it'd help me stay organized. Unfortunately, without a specific plan in place, it has done just the opposite. I hung the organizer in our home office space off the dining room. At the time, there were random papers on the kitchen counter so I grabbed those and neatly tucked them into the hanging slots. While I successfully got the papers off the counter, there really
was no rhyme or reason to the hanging organizer. In fact, I recently went through the papers in the organizer and found that most of them were expired or no longer relevant - so ultimately my "organizer" was only encouraging me to hang on to clutter. This is a classic example of how organizing tools, when not used in a functional way, can actually encourage disorganization. So - time to get this organizer in order!


I have hmmed and hawed about whether or not to keep the organizer hung up and if so, whether to leave it where it is at. After contemplating this for a couple weeks, I decided that the organizer itself could be very useful and I feel it's hanging in the best possible spot for now. I took a random inventory of the piles on the kitchen counter to get an idea of what categories I might need storage for. I did this over the course of a couple weeks, since our paper flow fluctuates throughout the week and month. I finally decided on five categories, one for each slot of the organizer: 1.) Outgoing, 2.) To File, 3.) To Read, 4.) To Pay, and 5.) Coupons.

I knew that if I didn't label these slots, I'd forget which is what and things would end up stuck in random slots and again, not be helpful. So I used Microsoft Excel to design some simple labels.


I printed out each label on regular white printer paper and used some packaging tape to make them a bit more sturdy. I've really got to invest in a laminating machine! That'd be a great birthday present idea... ;)


As you probably noticed, the final labels look a bit different than the labels shown in Excel. When I printed a test label, I realized the labels would be too big for the slot, especially when paper would be stuffed into each one. I modified the size just a tad and they work perfectly now. 

I didn't want the label to be permanent in anyway because I want to use this system for awhile and be able to make adjustments if necessary. For that reason, I just used small binder clips we had in our office supplies to attach each label to it's own mail slot.


Next, I went through all the papers that had been in the organizer and all the papers that had accumulated on the counter and sorted them accordingly. Everything seemed to fit into a category relatively easily.


The organizer is a little more bright and cheery and, with its new labels, it appears to be a bit more functional as well. I'm excited to put this great tool to good use!

Do you have an organizing tool that is hurting more than helping? How about a general birthday rule you think should be in effect?

Wednesday, January 22, 2014

Protecting Your Documents & Your Identity

A couple weeks before Christmas, I was shopping when I got a phone call from a credit card company. I was a little annoyed as the caller stated who they were and where they were calling from, thinking to myself that I wasn't in the mood for a telemarketing call while dodging traffic and crowds all while on a time crunch. But as the caller kept talking, I realized this wasn't a telemarketing call at all.

I own one credit card that I use only to buy gas because it gets me so many cents off per gallon and coupons at our local supermarket. Apparently, that credit card information had been stolen and my card number was used earlier that day to buy almost $500 worth of various items including electronics and a Match.com membership. Luckily, the credit card company flagged the purchases before they got too out of hand and denied four more after that. They were calling to verify that the purchases made were not mine. They definitely were not.


Thankfully, everything worked out just fine. I got a new card and all the illegal purchases were credited to my account with no interest, late fees, or any other issues. But that got me thinking about how terrible the situation could have been and I decided it was time to research some of the identity theft protection plans out there on the market. I'm not being paid or rewarded by any of these companies. In fact, they don't even know I exist at this point. But I figured if I was going to spend the time doing the research, I might as well share the info with you in case you're looking for this option as you get organized in the New Year.


1. LifeLock


LifeLock offers a five point protection plan. First, they monitor your credit and contact the major credit bureaus to get your name off the pre-approved credit offers list. Second, they monitor your personal info for new credit and non-credit applications and address changes. They also monitor known criminal websites for illegal selling of your personal information. For an upgraded fee, they will even scan for new checking and savings accounts being opened in your name. Third, they contact you any time they detect a threat, something as small as a change to the contact info on your bank accounts. And if your wallet gets stolen, they'll help do the leg work to cancel your accounts and replace its contents. Fourth, they back up their protection with a $1 million guarantee. If you do become a victim of identity theft while a LifeLock member, they will spend up to $1 million to do whatever it takes to remedy the situation. Identity theft insurance is included with a zero dollar deductible that reimburses you for fraudulent withdrawals, lost wages, document replacement fees, and other out of pocket expenses. Last, they track your monthly credit score so you are up to date with any changes and you get annual credit scores for all three major bureaus.


Credit Score Managment is available for $14.95 a month or $165 a year. LifeLock Identity Theft Protection is available for $10 a month or $110.00 a year. You can also upgrade to LifeLock Ultimate for $25 a month or $275.00 a year. Each family member must have an individual enrollment to be covered.

2. Identity Force


Identity Force offers monitoring of change of address info, court records, credit reports, identity, payday loans, proactive credit, and sex offender records. You get instant online access to your credit reports from all three major bureaus; help opting out of the most frequently used junk mail databases; and online privacy tools like anti-phishing and anti-keylogging software. Restoration services are available in the event of a theft. Specialists can be reached 24/7. Lost wallet assistance is also an option allowing you to cancel and replace credit, debit, and ATM cards quickly if necessary.


Two plans are available. The first is called UltraSecure and is $17.95 a month or $179.95 per year. It comes with a 14 day free trial. The second is called UltraSecure + Credit and is $23.95 a month or $239.50 per year. The difference is that UltraSecure + Credit offers you everything the UltraSecure package does but adds in the daily credit monitoring, 3 bureau credit reports and scores and a monthly credit score tracker.

3. Identity Guard


Similar to the first two companies, Identity Guard offers credit monitoring, identity monitoring, and monitoring of public records. You are able to view your credit report and score by logging in to your Identity Dashboard anytime. You can select e-mail, text, or phone as your preferred method of contact so you're sure to get alerts as soon as they are issued. They also offer a Mobile App. Internet protection is covered by a software package providing Anti-virus, password protection, and keystroke encryption.

They provide personal recovery assistants to help with recovery if necessary, though the site doesn't state 24/7 availability. Up to $1 million in identity theft insurance is included along with lost wallet protection. The lost wallet protection includes helping you access up to $2000 from one of your accounts while your cards are being replaced.


There are three plans available. Essentials is offered at $9.99 per month and includes SSN monitoring, ID verification alerts, and up to $1 million identity theft insurance. Total Protection comes in at $19.99 per month and adds Public Record Monitoring, the software package, quarterly 3 credit score and 3 bureau credit reports updates. Last, the Platinum program is available for $24.99 a month offering all of the benefits of the Essentials and Total Protection Plan plus monthly 3 credit score and 3 bureau credit report updates.

4. Zander Insurance


I remembered hearing Dave Ramsey talk about identity theft protection at one time and I decided to quick visit his website to see if I could find any more information. Now I understand that not everyone agrees with Mr. Ramsey nor follows his plans/ideas/advice, etc but I found a great deal on Identity Theft protection through his site. He recommends Zander Insurance group for all of your insurance needs. I confess, I don't use Zander for any of our insurance needs but they have a good identity theft package available.

There is an individual plan available for $75.00 per year or $6.75 per month and a family plan available for $145.00 per year or $12.90 per month. Both plans provide $1 million reimbursement protection, unlimited recovery services, 100% recovery success, prevention services and support, and electronic stolen fund transfer protection. It also includes access to free credit reports, the Do Not Call registry, junk mail opt out programs, and credit report reminders three times per year. 

So many options to pick from. If you're thinking of getting some form of identity theft protection for you and/or your family, be sure to do more research into each company to see which one fits your needs best. Also, check with your homeowner's insurance provider to see if they offer some form of this coverage as well.


If you have some form of identity theft protection, I’d love to hear what company you are using and if you’re satisfied with their services!

Wednesday, January 8, 2014

Paper Pile Management ~ Part 3

A few weeks ago, I decided to re-organize our home filing cabinet. I divided the project into three parts. First, I organized our active files into new, alphabetical file folders and gave them a new home in our home office area. Second, I decided to store our inactive files in accordion files placed inside a bankers box that can easily be stashed in our office closet. That left me with three very large folders with a lot of miscellaneous stuff inside.


One folder was full of our travel memorabilia. It held ticket stubs, maps, photos, and other souvenirs from our various trips and vacations. 

The second folder was labeled "wedding" and it was my way of "filing" all of the paper that we accumulated in the planning of our wedding. When the wedding was over, I wanted to get rid of that stash of paper quickly, so it seemed easy enough to throw it in a folder and stuff it into the filing cabinet. But with this new organization of our paper, it really didn't fit into the active or inactive files. 

The last folder was overflowing with warranty information and manuals for all of our appliances, furniture, and electronics. It was so hard for me to find anything in this folder when I needed it so I knew something better had to be done.

I decided to conquer these last three categories by storing the items inside a binder. The binders can be kept in a cupboard in the home office so they are easily accessible when needed but out of sight otherwise. I didn't want to spend a lot of money on this project because I don't think it's a permanent solution. Eventually, I'd like to make some sort of scrapbook or other project to document our travels and I'm not sure how long I want to hang on to all of the receipts from our wedding. But for now, this binder solution seems to work well.


I did the wedding binder first since it's the smallest. I went through all of the paper in the folder and divided it up into logical categories. In the end, I had four: Receipts; Photography; Memories; and Pre-marital Counseling. Each category got one or two page protectors depending on the number of documents it held. This was a fairly easy binder to organize and it will help in the future when I'm trying to find our photographer's printing license or remember how much we spent on that delicious cake....


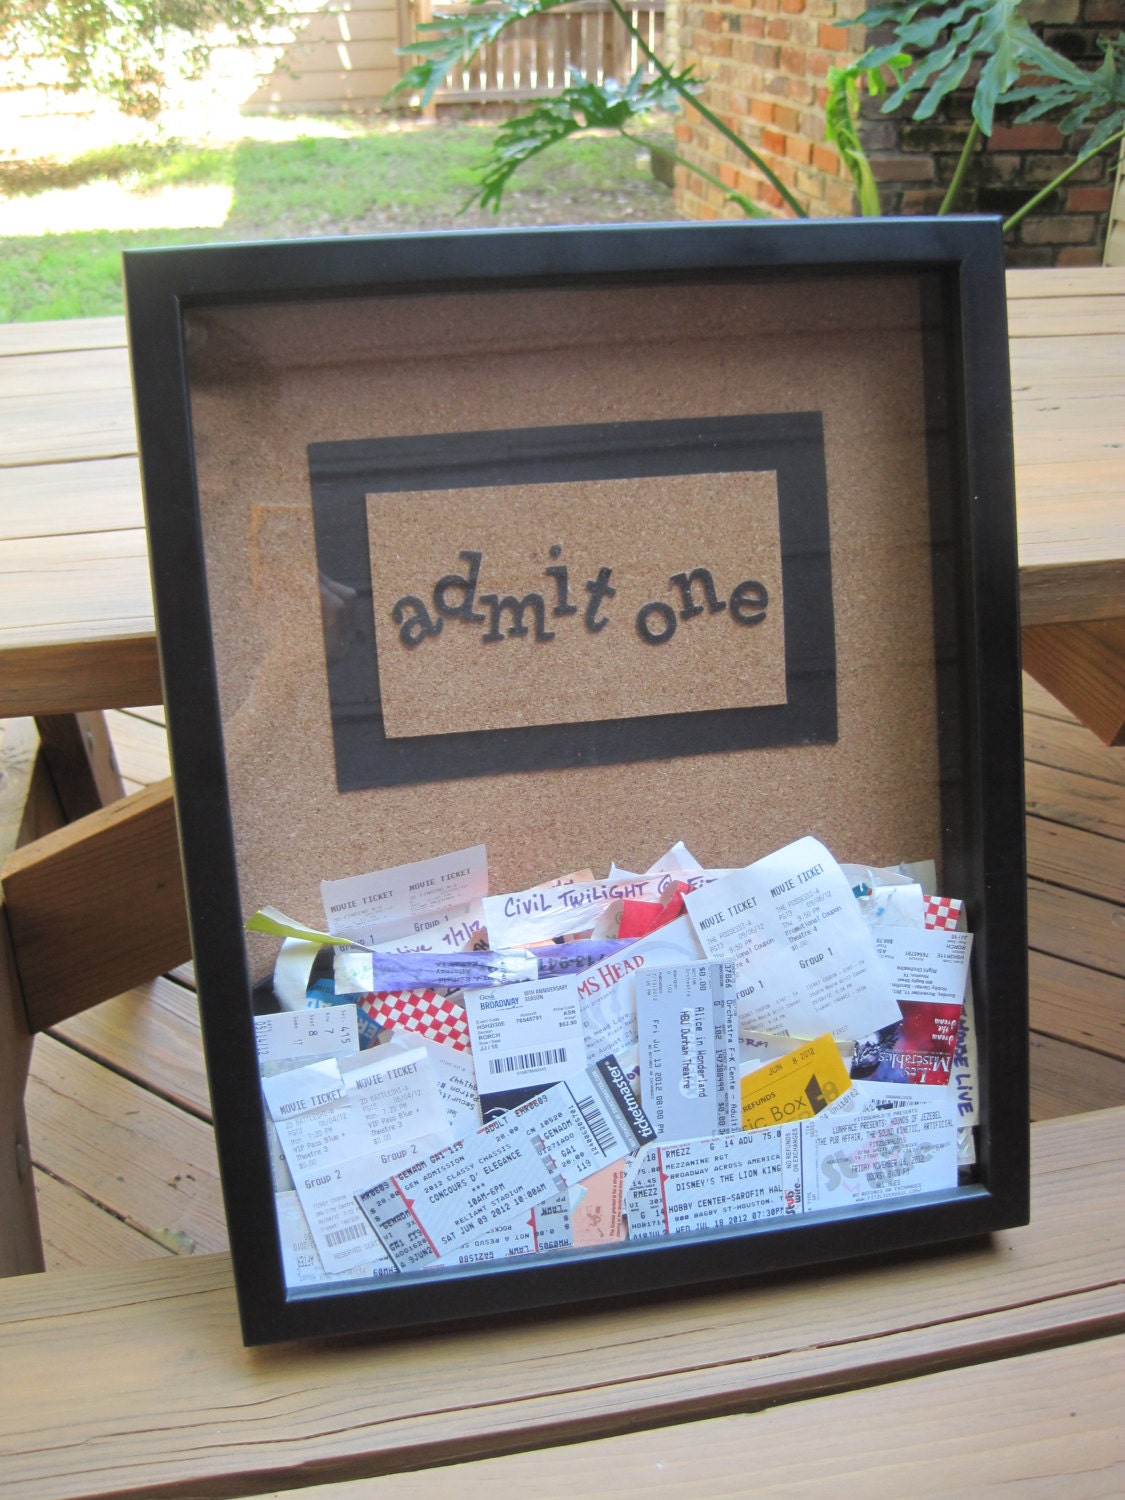
Next, I put together the trip binder. I sorted through all the stuff in this folder and divided it by trip. I kept all of the ticket stubs separate because I'd like to do something special with those eventually. Here are a couple ideas...


Ticket Stub Magnets
Image Via
Ticket Stub Memory Box - Wall Hanging - FREE Shipping!
Image Via

Each trip went into its own page protector so when I (someday) put together a scrap book or project, all our keepsakes will be protected and in one place.


Last, I tackled the manual mess.


I started by sorting through all the manuals and dividing them into categories as well: Furniture; Appliances; Electronics; and Miscellaneous.


I went through each category and made sure that we still had each particular item and then put each category into it's own page protector (or two).


I think I'd like to go back and expand this binder when I have time to put each manual in it's own protector and divide the binder into more than four categories. But for now, this is a vast improvement from where we were before:


Before!


After!


So that concludes my paper pile management project. I haven't decided what to do yet with our tippy plastic file cabinet. It might just get donated to Goodwill. We'll see. But I've been keeping up on our filing much better and I know exactly where to find the information I'm looking for. Ahh, that feels good!

How do you manage your paper piles?

Monday, December 30, 2013

Paper Pile Management ~ Part 2

Just last week, I was here talking about our new filing system for all of our active files. I promised to come back and show you how we're handling our inactive files and, I try not to make promises I can't keep, so here you go!


Our inactive files are those files that paper is either no longer being added to at all or being added very rarely. These files include tax paperwork from previous years, awards and certificates, employment documents, etc. It seemed silly to me to keep these with our active files. They just clutter the drawer, making it more difficult to add to the active files on a regular basis. I decided it would be sufficient to store these inactive files in a banker's box for now. I'm not 100% settled that this is a permanent solution, but I'm trying it out to see how it works. I've learned that most organizing projects are ongoing. You set up a system and use for a bit and determine what works and what doesn't and then make adjustments accordingly. After all, you can have the greatest looking organizational system but if it doesn't work for you, it's pointless.

So, I decided to use simple accordion files for this project. These files are slim, but expand as needed. This is helpful as some of our inactive files are rather small (like tax return papers from 2006) and others are quite large (like certificates, awards, letters of reference, etc). I printed the same labels I used for our active files and affixed those to the accordion files.


Then I filled each file, keeping things in date order as much as possible. This way, I know when I file additional papers in each folder to file them in the back. I put the files in alphabetical order and put them in a bankers box. I considered wrapping the box in wrapping paper or scrapbook paper to make it a little more attractive, but since I'm not 100% sold on keeping this solution, I left it alone for now. 


This box can be stored in a closet or on a storage shelf and accessed only when necessary.


So our active files are stored in an easily accessible drawer in our future "home office" area and our inactive files are stored neatly in a box out of the way. That leaves one last project to contain our paper. I had three very large folders in that tippy filing cabinet: Trips, Wedding, Manuals. At one time, this was an easy way for me to keep tickets and souveniors, important documents from our wedding, and all those manuals that come with electronics and other gadgets. But it didn't take long for these folders to get way out of hand. In fact, while I was cleaning and purging the file cabinet, these folders kept spilling all over the table. So it's time to come up with a new solution for these items. Look for that post next week!

What do you think? How do you store files that aren't accessed often?

Monday, December 23, 2013

Paper Pile Management ~ Part 1

Once upon a time there was a filing cabinet. Though it held files sufficiently, it was a pain to open and use effectively. Piles upon piles of paper became stacked upon it and nothing could ever be found. Then one day an organizing addict came along and ... well you get the point. 

We have had this plastic filing cabinet forever. 


It holds hanging file folders and it's on wheels so it's easy to move from one place to the next, but that is about the end of it's positive traits. 


It's hard to get into the files towards the back of the drawers because the drawers don't open all the way and, when the drawers do open as far as they can be opened, the cabinet tips over. 


Due to these annoyances, our paper filing most often got set on top of the cabinet which is not an efficient means of organizing all the paper that comes into our home. So I decided it was time for a change!


To start this project, I went through every folder and purged anything we no longer needed. Then I reorganized the remaining contents into date order. By the time I was done, I had about 8 inches of paper to shred or recycle! (Not sure what to keep and what to purge? Check out these resources: Resource 1, Resource 2, Resource 3)


I didn't want to put the newly organized hanging files back into that filing cabinet because I knew the cycle would repeat itself. At the same time, I didn't want to go out and spend money on a new filing cabinet. Luckily, I was able to find the perfect solution already in our home. We have a nice desk area built into the dining room. One day (far far from now) I imagine our office will be used as a bedroom so I'm hoping to move our office space into this built in area gradually. Behind two of the cabinet doors are these wonderful drawers, split into two compartments. The forward most compartment is the perfect size for file folders. I was hoping I'd be able to use my existing hanging file folders but the compartment is just a hair too wide. That gave me an excuse to make up some new pretty folders!


I found some traditional file folders at the dollar store priced 10/$1. I grabbed some filing folder labels at Office Max and printed them with a simple background to add some color.


I affixed the labels onto the new folders and put them in alphabetical order.


Then I put all the organized paperwork into the new folders and put them in their new home. They fit perfectly!


Organizing our paper filing didn't stop there though. As I was going through each folder and purging what we didn't need, I noticed two distinct categories: Active files and Inactive files. The active files are the ones in which paper is being added to them on a regular basis such as pet files, insurance policies, car repairs, etc. The inactive files are the ones in which paper is no longer being added to them or is only added on a very limited basis. These include tax files from previous years, certificates or awards the mister or I receive, etc. It made sense to put the active files in this new easily accessible location but I didn't want to clutter the drawer with all of the inactive files. Stay tuned for how I decided to organize those!

Does your filing system encourage you to keep paper organized, or are you in the same boat I was with a stack of paper on top of your cabinet?


Wednesday, December 4, 2013

Taming Magazine Madness

I love magazines. The bold and bright colors, the anticipation of what's going to be on the next page, the feel of the shinny paper on my fingertips. In this digital age, many magazines are offering digital subscriptions in lieu or in conjunction with a paper magazine subscription. While I do own an iPad and enjoy reading certain types of articles on it, I just prefer a paper copy magazine so much more. 

That being said, magazines have a way of accumulating very quickly in our house. I make it a point to only subscribe to a select few to help reduce the clutter, but a lack of time to read, a lack of an organizational system to store, and an ongoing nagging feeling that one day I'm going to want to refer back to that one article on that one topic cause the piles to grow oddly fast. 

Since starting this blog, my magazine hoarding has increased substantially as I find blog ideas and inspiration for personal organization products and don't want to toss them into the recycle bin hoping I can find the information online later. So I decided to get a handle on this magazine madness by creating a magazine binder.


When I read through a magazine, I dog-ear the pages that offer some sort of information I'd like to hang on to. It may be a color scheme, a remodel project, a recipe, etc. I went back through some of the magazines I had already read and stashed on a shelf and ripped out all of the dog-eared pages. Then, I went through each ripped out page and gave it some sort of category like style, home colors, tips and tricks, etc.


I had some empty binders laying around in our home office and I found some three-hole-punched divider labels and some sticky tabs that I must have purchased for some other forgotten project. I made a tab for each category and stuck them onto the divider labels.


Then I three hole punched my ripped out pages and put them in the binder by category. As I read through more magazines and discover new categories, I can easily create another divider label and insert it into the binder accordingly. 


I will admit, it was very difficult for me to toss the read-through, ripped-out magazine into the recycle bin, but having just one binder to stash away is so much more open-concept than having a giant stack of dog-eared magazines that are timely to sort through when searching for the elusive one article about that one thing.

How do you organize your magazine madness?
Related Posts Plugin for WordPress, Blogger...